
Why Almond Shaped Nails Are Universally Flattering
There is a reason why nail technicians across the world consistently recommend almond shaped nails when clients ask for the most flattering option - this shape has an almost magical ability to make every hand look elegant, every finger look longer, and every nail bed look more proportional. If you have been wondering how to file almond shaped nails at home, you are about to learn the technique behind one of the most universally loved nail shapes in beauty.
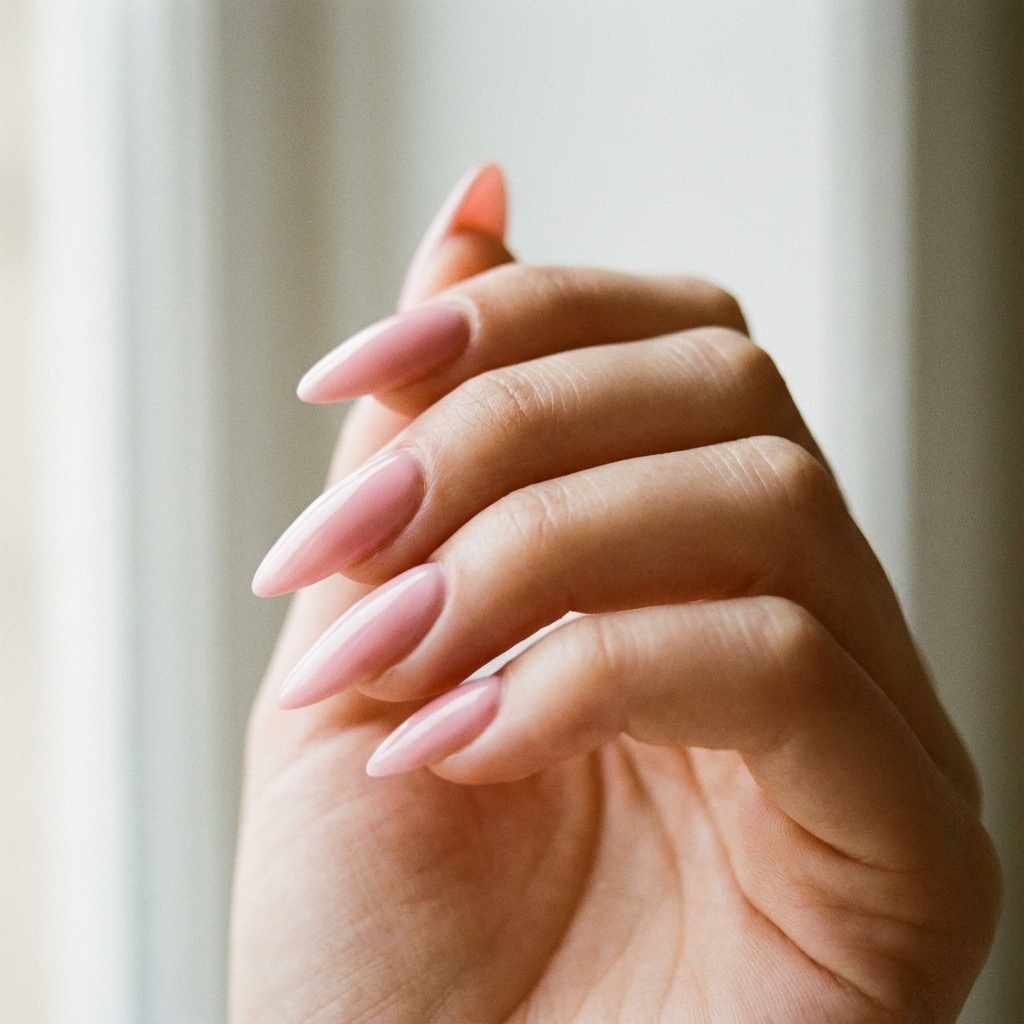
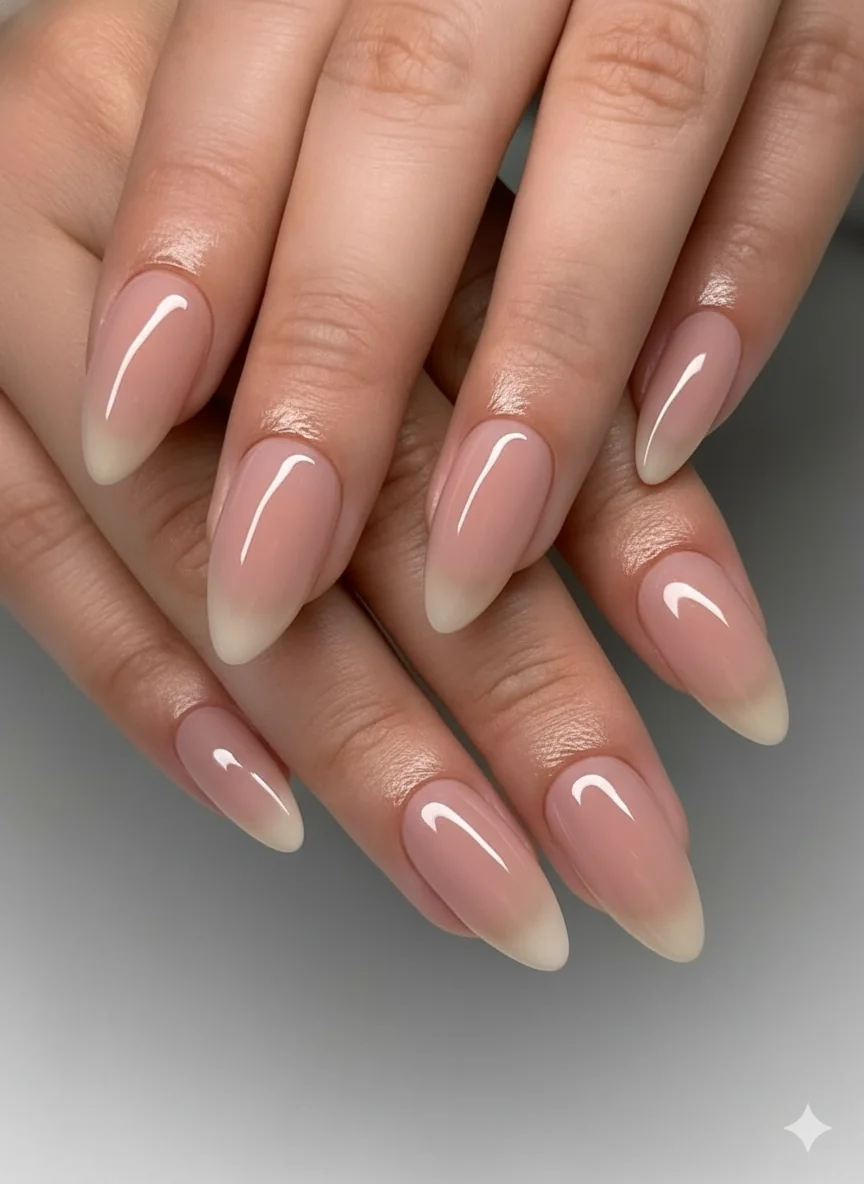
Almond shaped nails get their name from the humble almond nut. Like an almond, these nails are wider at the base, taper gradually along the sides, and come to a softly rounded peak at the tip. There are no sharp edges, no dramatic points, and no harsh angles. Everything about this shape is smooth, natural, and graceful.
What makes almond nails so universally flattering is the way they create visual length without looking extreme. The tapered sides create a narrowing optical illusion that makes wide nail beds look slimmer, short fingers look longer, and hands look more delicate overall. But unlike stiletto or coffin shapes that can look dramatic or high-maintenance, almond nails feel approachable and elegant in a way that works for literally any occasion - from a job interview to a wedding to a lazy weekend brunch.
The popularity of almond shaped nails for beginners has exploded in recent years, and for good reason. This shape is more forgiving than it might seem - unlike perfectly square or perfectly round nails where asymmetry is immediately obvious, the organic taper of an almond shape naturally masks minor imperfections in your filing. That makes it an ideal shape for anyone learning to file their own nails at home.
Almond vs Other Nail Shapes - Understanding the Difference
Before you start filing, it helps to understand exactly how almond nails differ from other popular shapes. This clarity will help you avoid accidentally filing into a different shape.
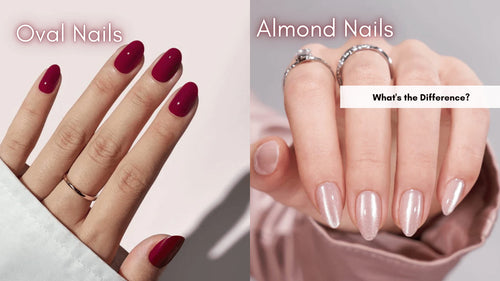
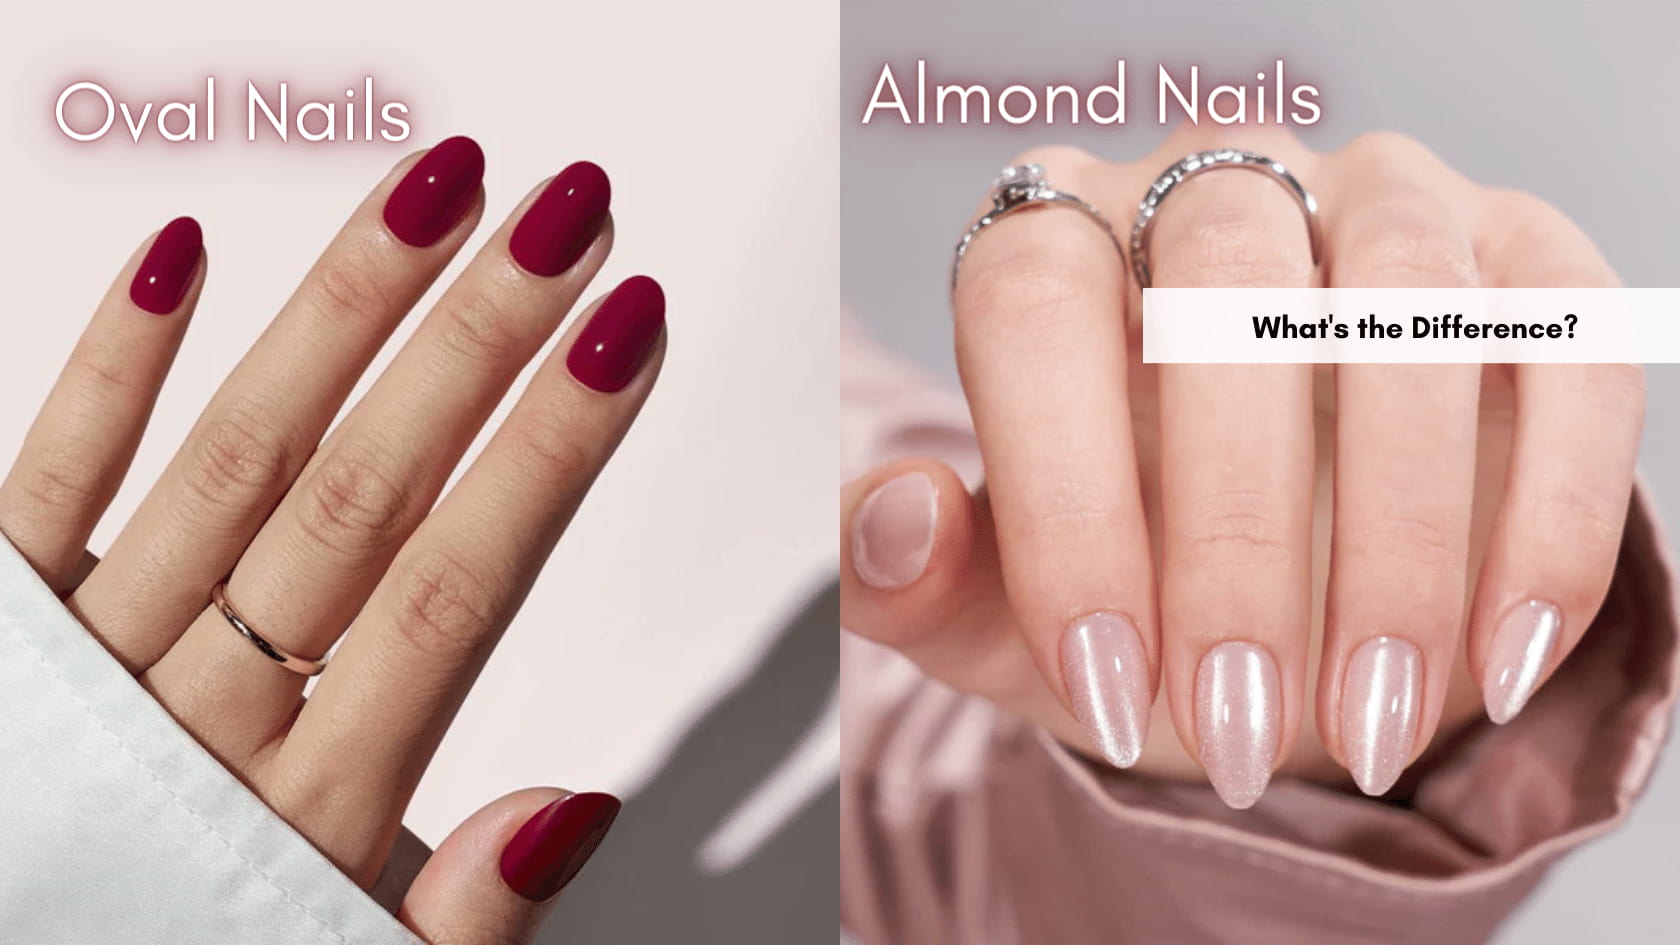
Almond vs Oval
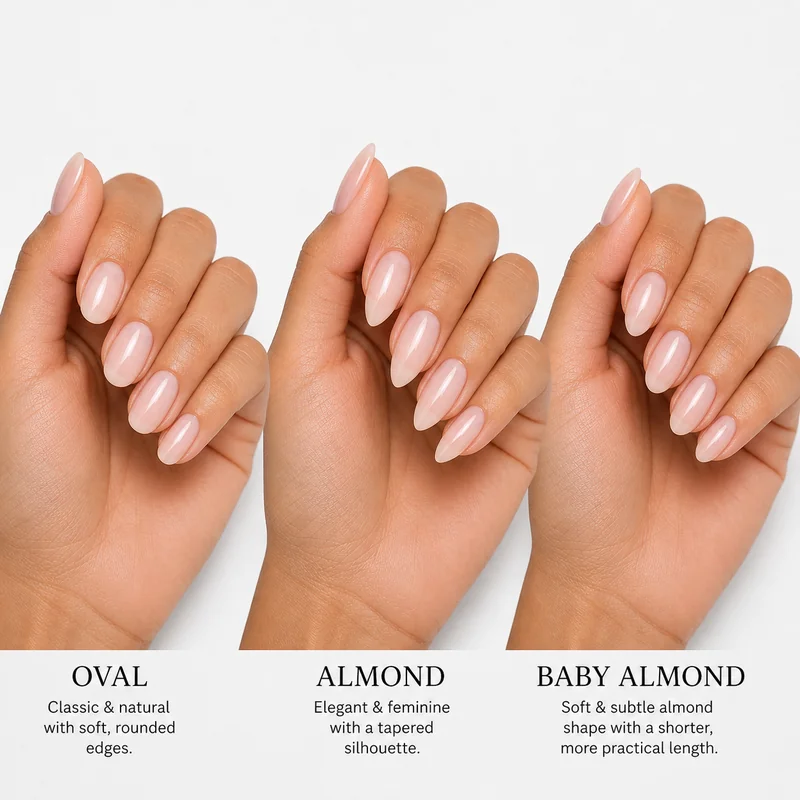
These two shapes are the most commonly confused, and the difference is subtle but important. Oval nails have a symmetrical, evenly rounded tip - like the shape of an egg. Almond nails taper more dramatically toward the tip, creating a slightly narrower, more pointed peak. Think of it this way: oval nails are wider at the tip than almond nails, but narrower than round nails. The almond shape is like a slightly more dramatic version of an oval.
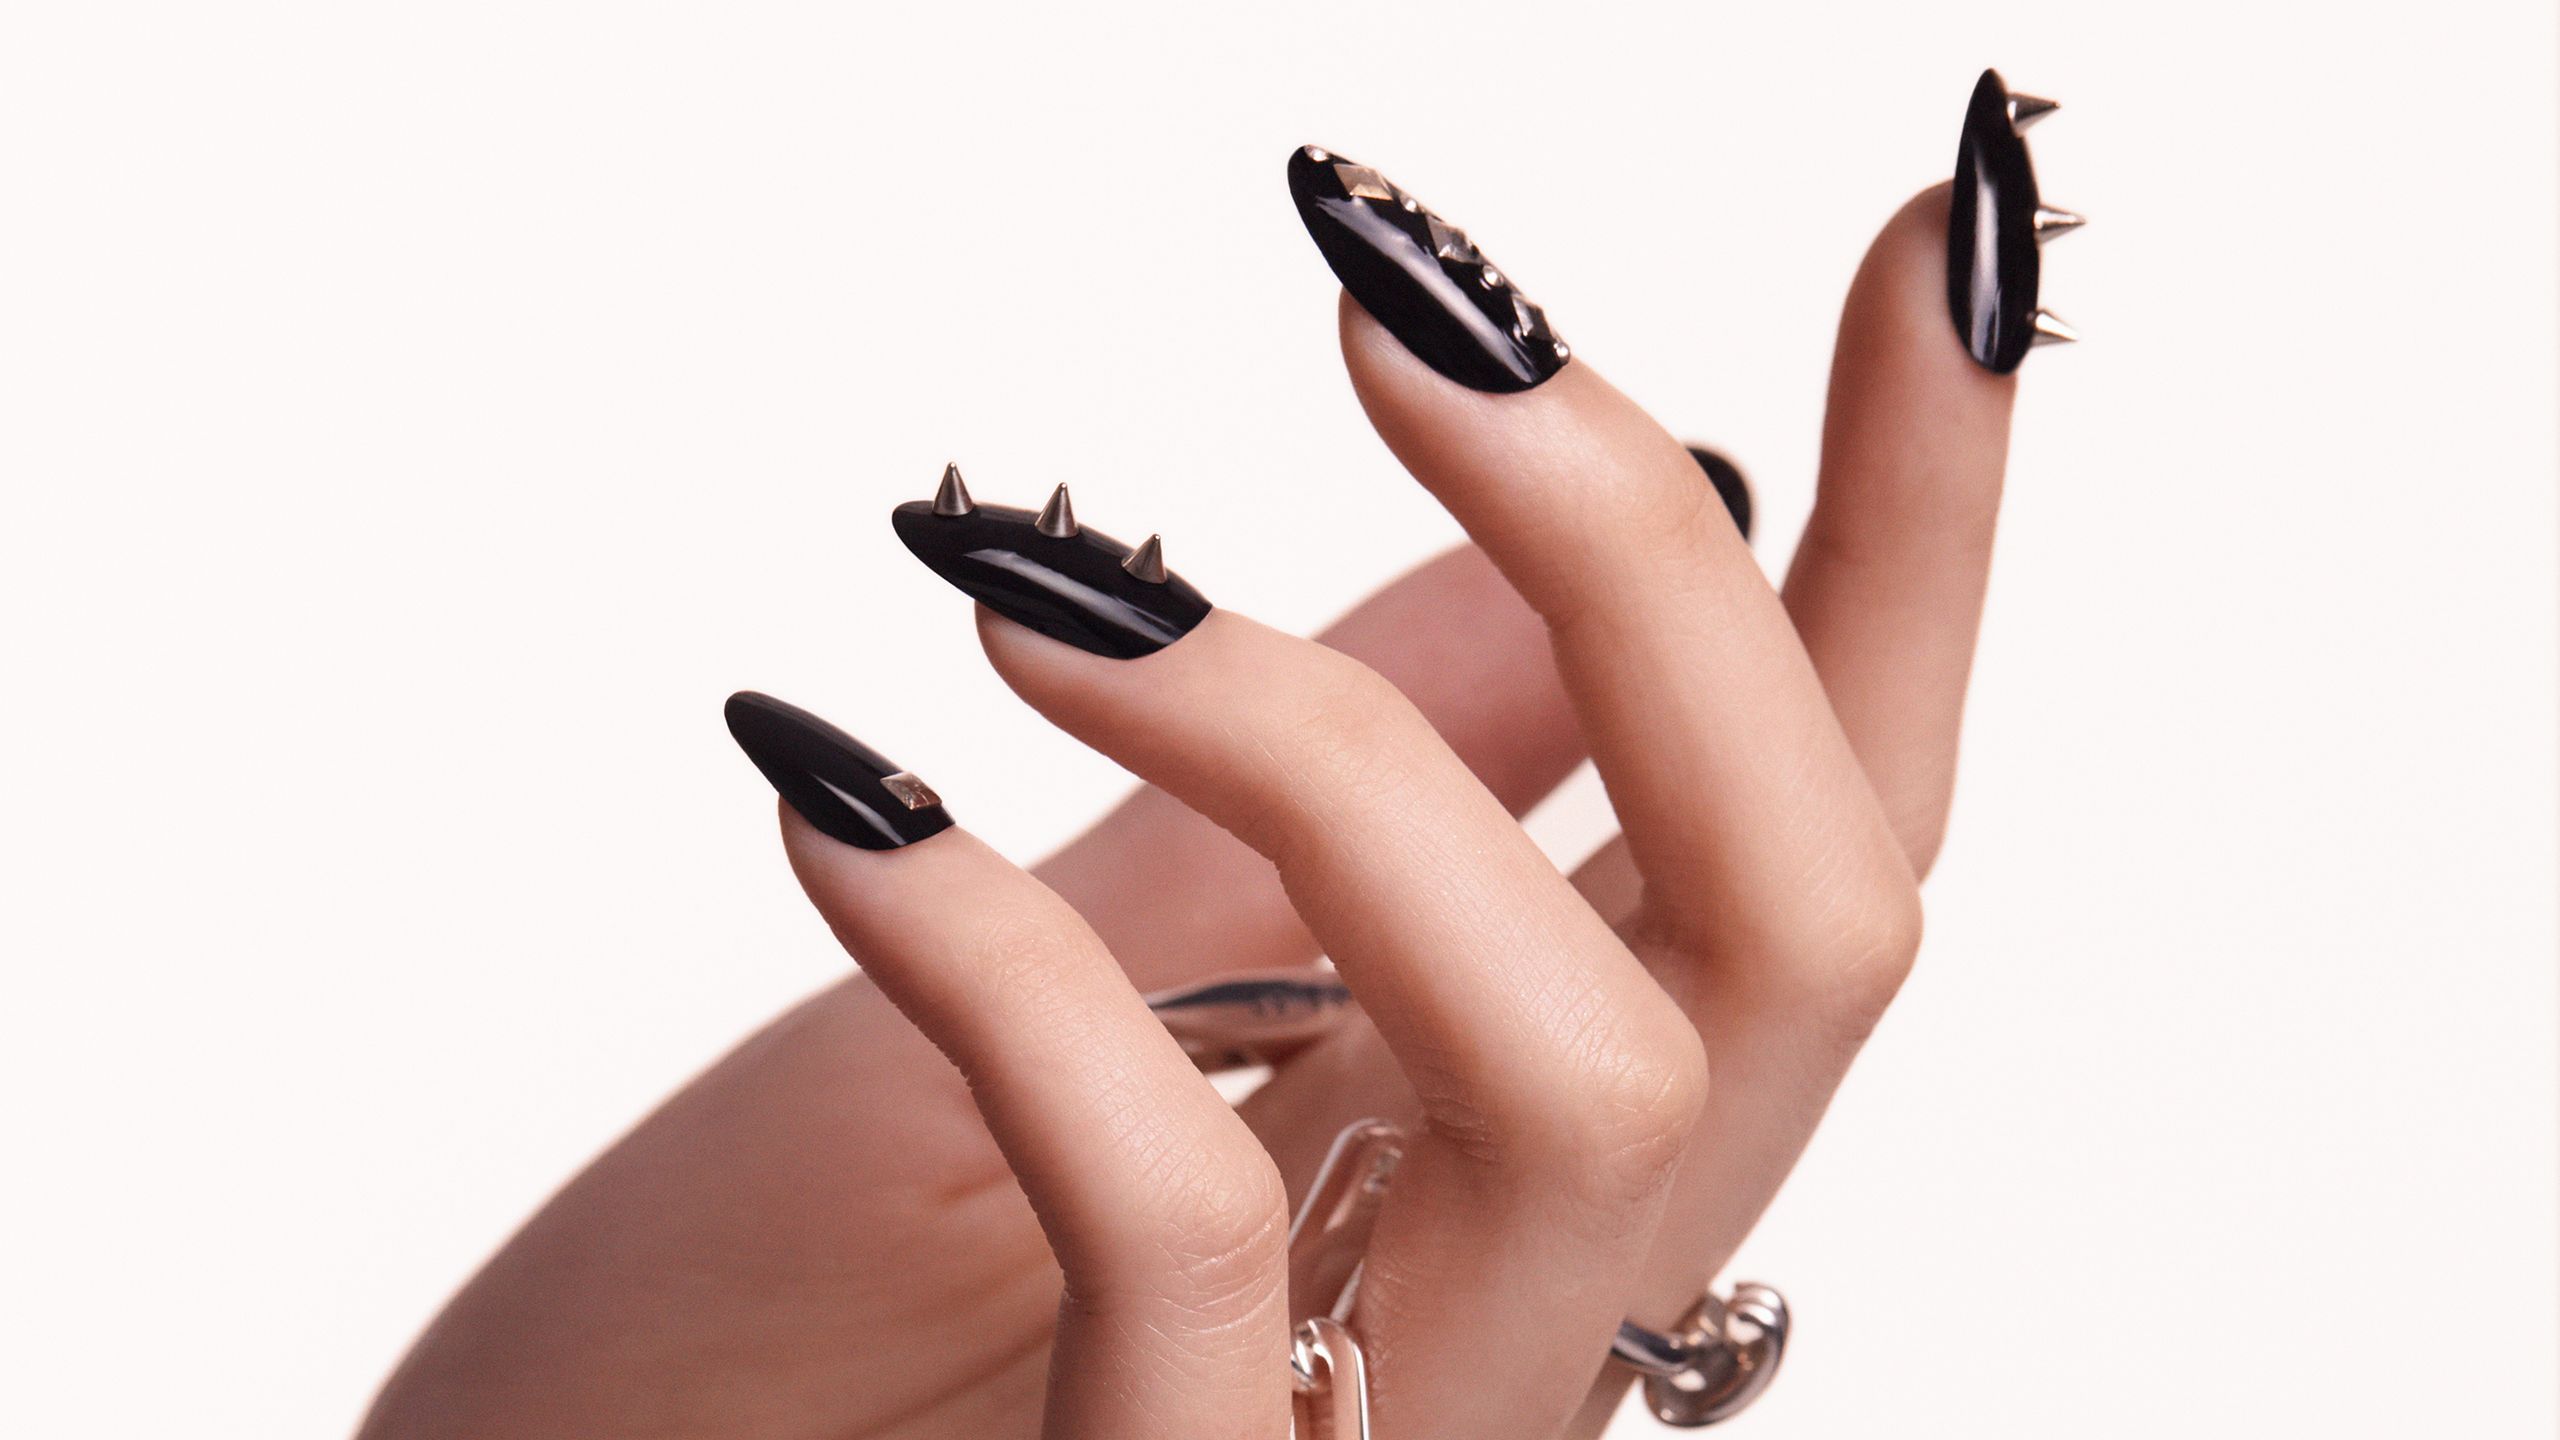
Almond vs Stiletto
Stiletto nails take the almond taper to an extreme, coming to a sharp, dramatic point. Where almond nails have a softly rounded peak, stiletto nails have a true point. If you are filing almond nails and notice they are getting very pointy, you have gone too far into stiletto territory. The fix is simple - gently round off the sharp tip until it feels soft and smooth.
Almond vs Coffin
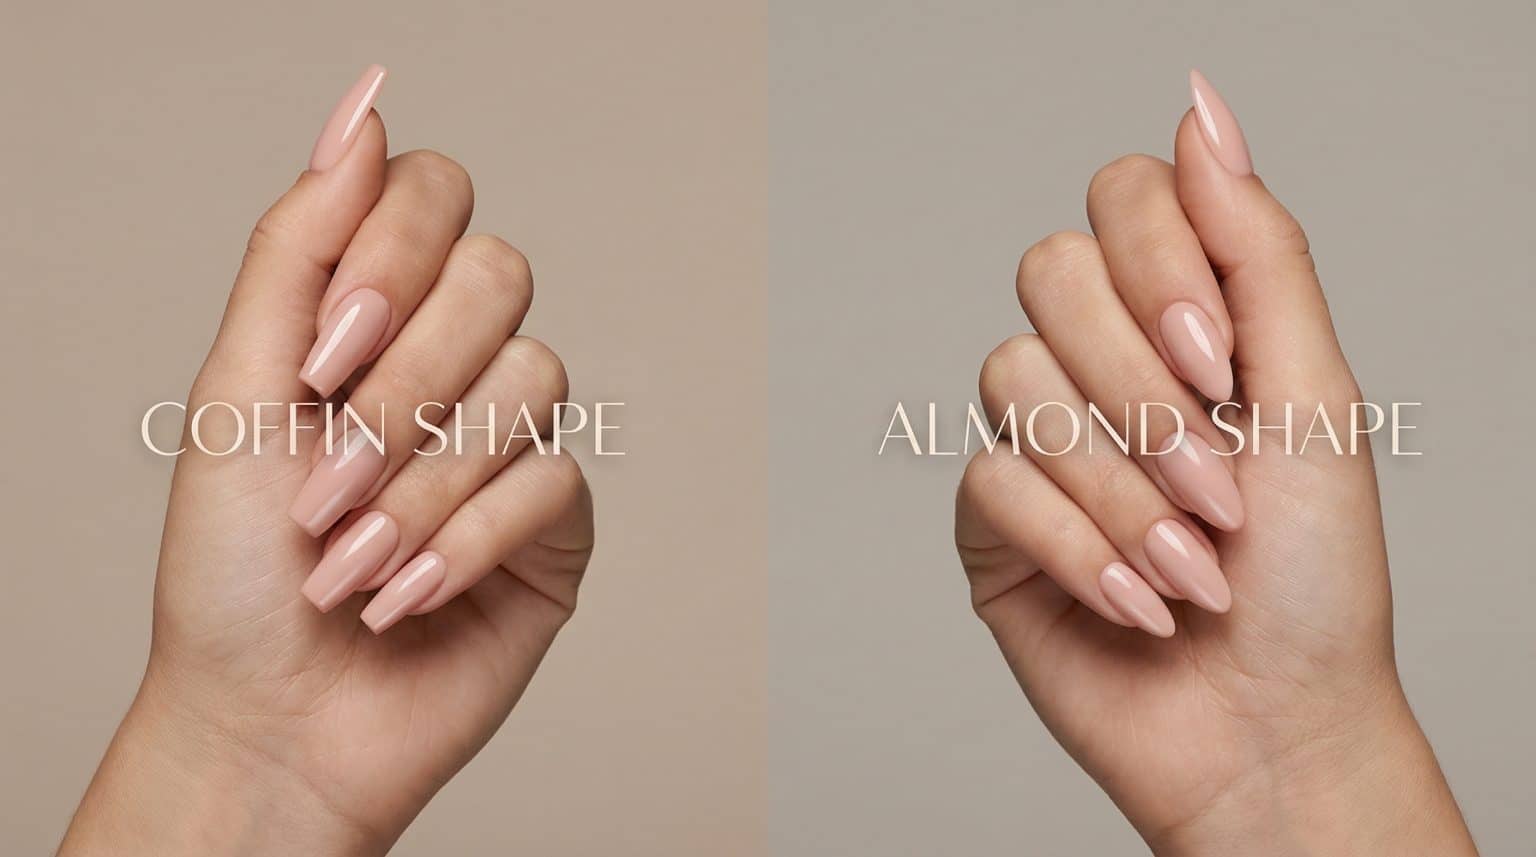
Coffin nails start with a similar taper to almond but then have the tip filed flat, creating a squared-off edge. Almond nails never have a flat tip - the peak is always softly rounded. If you are going for almond, resist the urge to file the tip straight across.
Almond vs Round
Round nails follow the natural curve of the cuticle and do not narrow at the sides at all. The sides of round nails remain parallel before rounding off at the tip. Almond nails, by contrast, begin to taper noticeably about one-third of the way up from the base, creating that distinctive narrowing silhouette. The taper is what distinguishes almond from round and gives almond its elongating effect.
What You Need Before You Start Filing

Having the right tools makes a significant difference in your results when filing almond shaped nails at home. Here is what you need and why each item matters.
A Quality Nail File
This is not the time for a metal nail file from the dollar store. For natural nails, you want a glass (crystal) file or a fine-grit emery board (180-240 grit). Glass files create the smoothest edge with the least damage to the nail plate. They also last essentially forever and can be sanitized easily. A high-quality glass nail file set is a small investment that makes a huge difference in the quality and health of your filing results.
Avoid coarse-grit files (under 150 grit) on natural nails. These are designed for acrylics and gel extensions and will shred and weaken natural nail plates.
A Nail Buffer
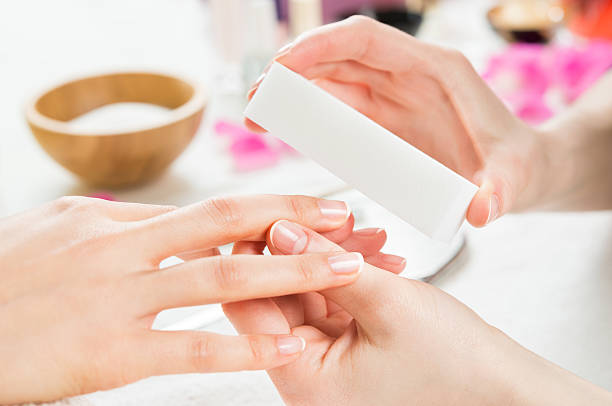
After shaping, a buffer smooths out any roughness along the filed edges and gives the nail surface a gentle polish. A four-sided buffer that goes from coarse to ultra-fine is ideal. You will use it after filing to refine the shape and smooth the nail’s edge.
Cuticle Care Tools
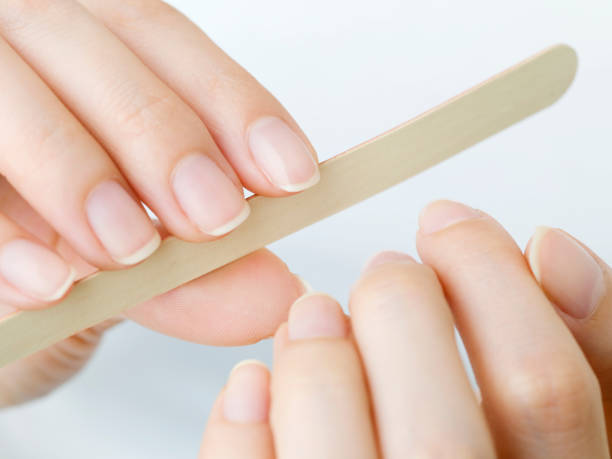
Push back your cuticles gently before filing. This gives you a clear view of your nail bed and helps you file symmetrically. A rubber-tipped cuticle pusher is gentler than a metal one and reduces the risk of damaging the delicate cuticle tissue. Apply cuticle oil before pushing to soften the cuticle.
Good Lighting

This might sound obvious, but many people file their nails in dim lighting and then wonder why the shape looks uneven in daylight. Sit near a window or use a bright desk lamp so you can clearly see the angles and symmetry of your filing.
A Reference Image

Save a photo of your ideal almond shape on your phone and keep it visible while you file. Having a reference to glance at helps you maintain the right taper and prevents you from over-filing.
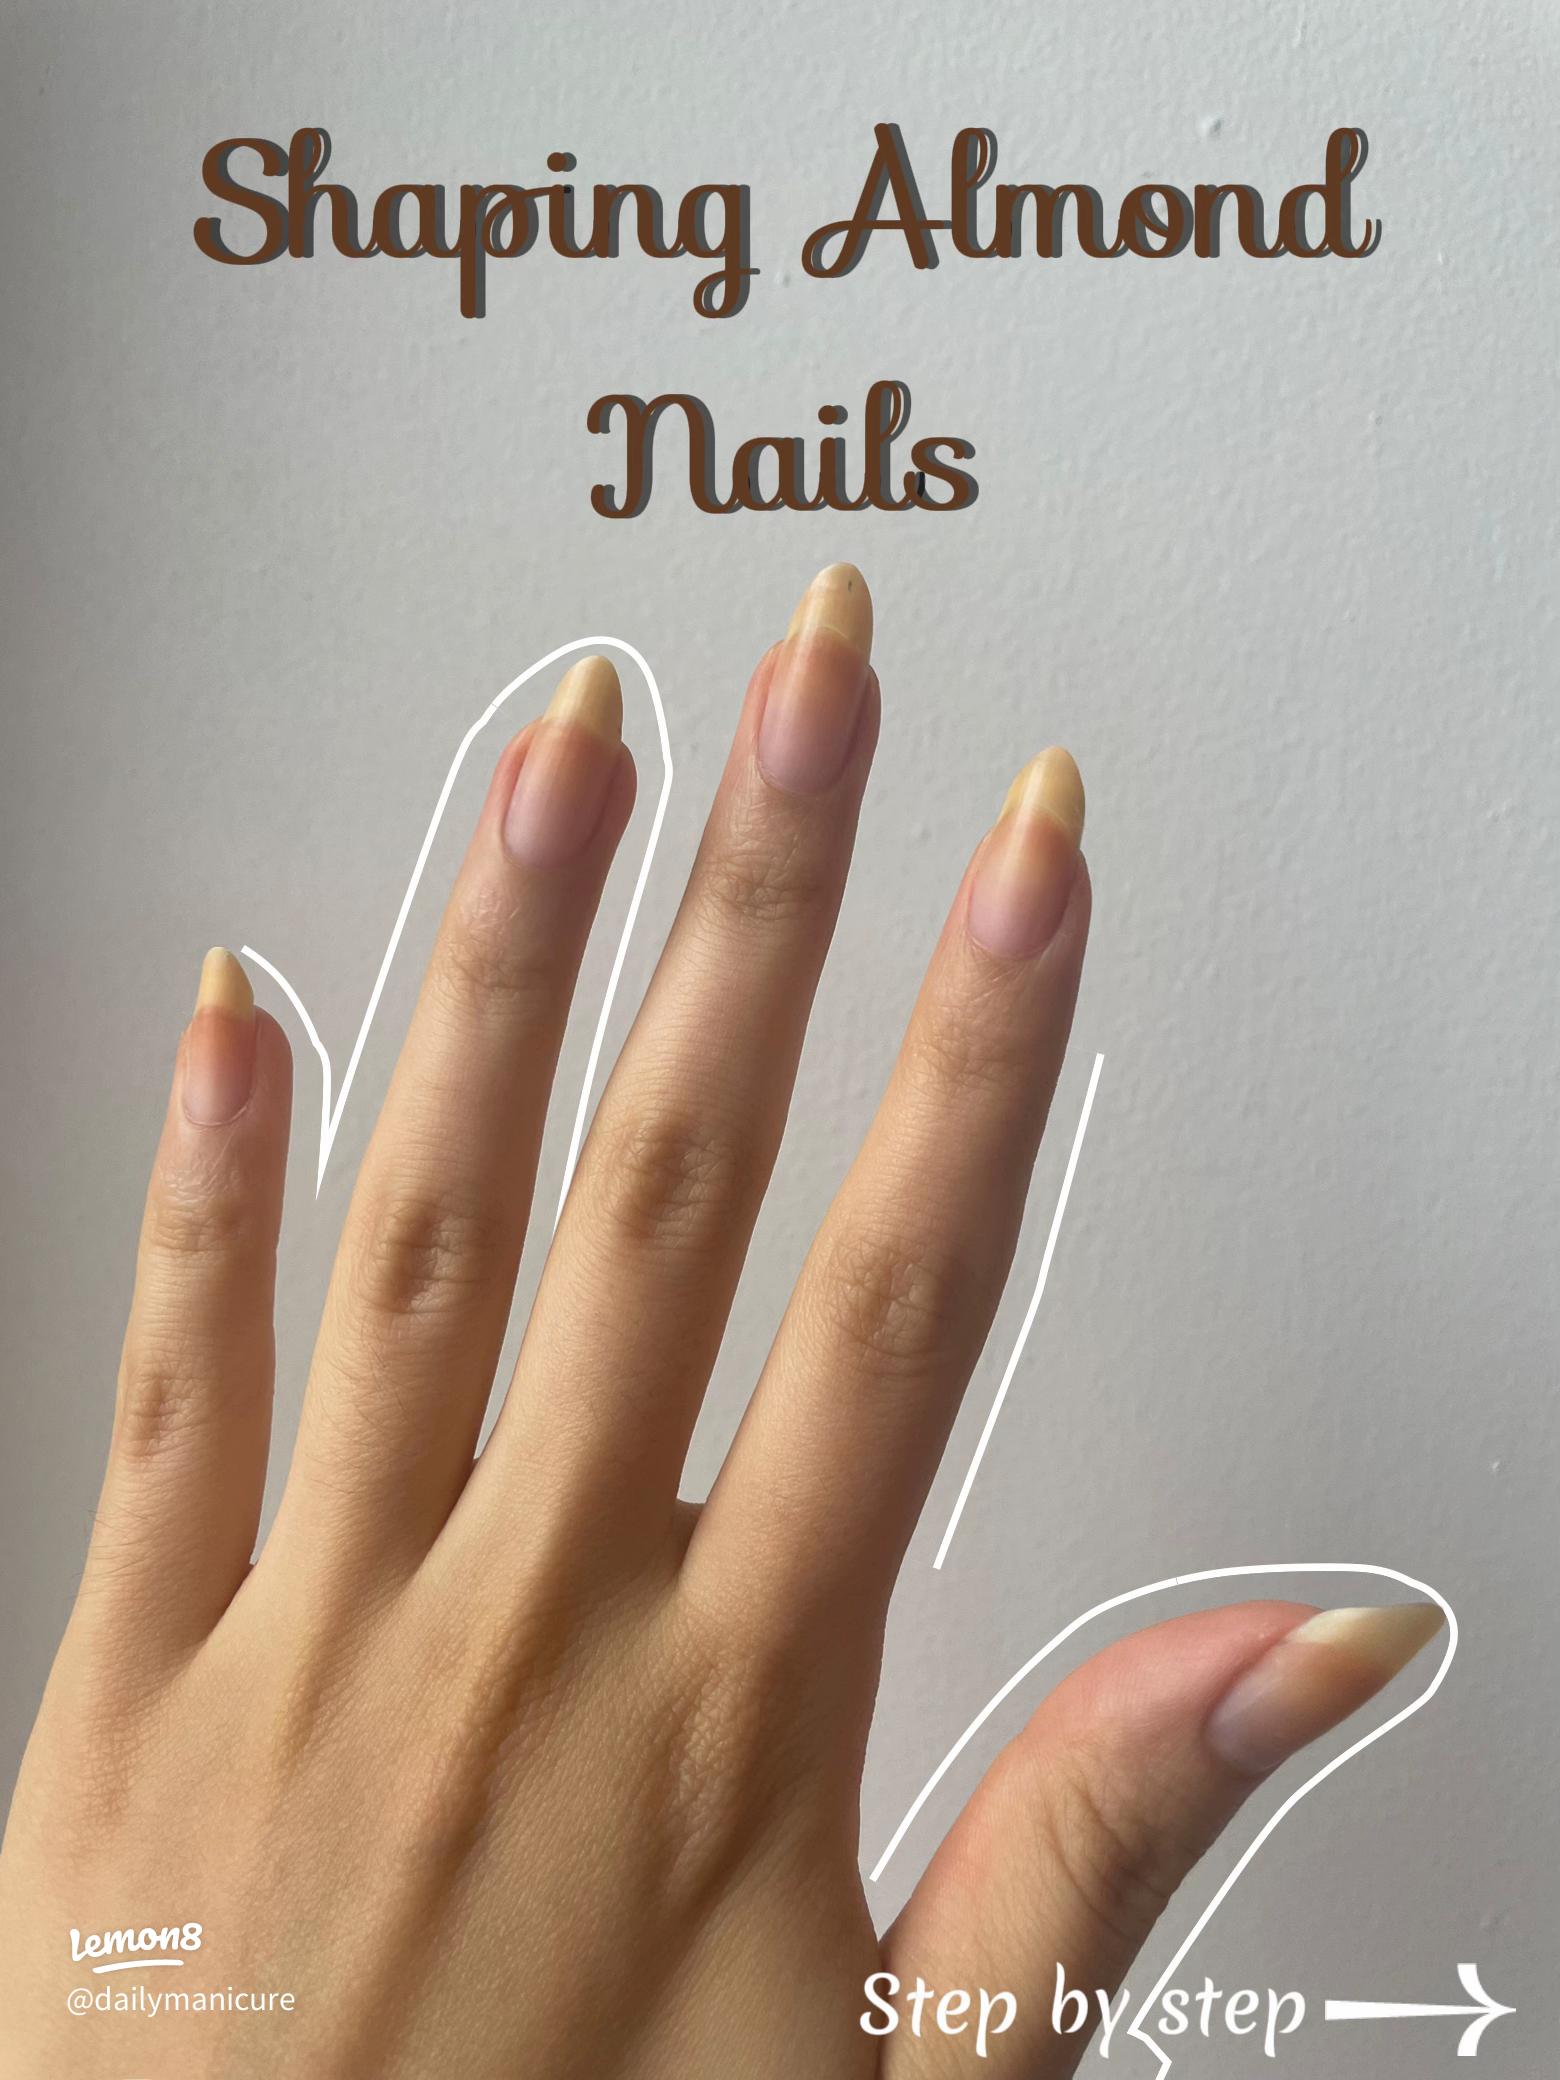
Step-by-Step Guide to Filing Almond Shaped Nails
Follow these steps carefully and you will have beautiful almond shaped nails that look professionally done. Take your time - rushing is the enemy of a good shape.
Step 1 - Start With the Right Length

Your nails need to extend past the fingertip by at least a few millimeters for almond shape to work. If your nails are currently very short, you might need to grow them out. Clip any nails that are significantly longer than the others to create a roughly even starting length across all fingers.
Step 2 - File the Sides First

This is the most important step and the one most beginners get wrong. Hold your file at a slight angle against one side of the nail, starting about one-third of the way up from the cuticle. File in one direction only - from the side of the nail toward the center tip. Do not saw back and forth, as this weakens the nail edge and creates an uneven finish.
Repeat on the other side, matching the angle as closely as possible. Step back frequently and look at the nail straight-on to check that both sides are tapering evenly. Symmetry between the two sides is what makes almond nails look polished and professional.
Step 3 - Shape the Tip

Once both sides taper evenly, gently round the tip. You want a soft, rounded peak - not a sharp point. File from each side toward the center of the tip with gentle, short strokes. The tip should look like the end of an actual almond - gently pointed but never sharp enough to scratch.
Step 4 - Refine and Smooth
Look at each nail from multiple angles - straight on, from the side, and from above. Make small adjustments to even out any asymmetry. Then use your buffer to gently smooth the filed edges. This removes any tiny rough spots that could catch on fabric or snag.
Step 5 - Repeat on All Nails
File each nail individually, checking symmetry as you go. Try to match the taper angle and length across all ten nails. It is helpful to do one hand completely, then match the other hand to it rather than alternating.
Step 6 - Hydrate
After filing, apply cuticle oil around each nail and massage it in gently. Filing can be drying, and the oil helps seal and protect the freshly filed nail edges. A cuticle oil pen makes this quick and mess-free.
How Long Do Your Nails Need to Be
One of the most common questions about almond shaped nails is how long they need to be. The short answer: longer than you might think, but not as long as you might fear.
For a true almond shape, your nails need to extend past your fingertip by at least 3-5 millimeters. This length provides enough free edge for the taper to develop gradually without making the nail look too narrow or fragile at the tip. If you try to file almond shape into very short nails, you will either lose the tapered effect entirely or end up with nails that are too narrow and prone to breaking.
That said, there is a modified version called a “short almond” that works on nails with just 1-2 millimeters of free edge. The taper is more subtle, and the tip is rounder than a classic almond, but it still gives that flattering narrowing effect. It is a great compromise if you prefer shorter nails or if your nails are still growing out.
If you are growing your nails for almond shape, be patient and protect them during the growing-out phase. Keep nails polished with a strengthening base coat to prevent breakage, and be gentle with your hands during daily activities. Wearing gloves for household chores, opening cans with utensils instead of your nails, and keeping nails hydrated all help maintain length while they grow.
For those who want instant length, press-on nails and extensions in almond shape skip the growing phase entirely. We will cover those later in this article.
Common Filing Mistakes That Ruin Almond Shape
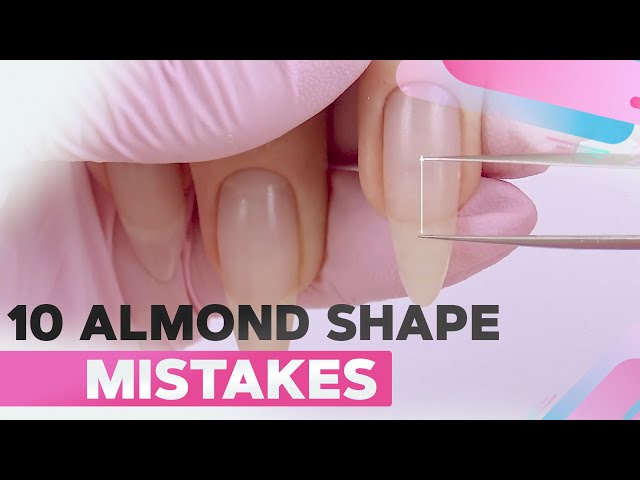
Knowing what not to do is just as important as knowing the correct technique. Here are the most common mistakes that turn a potentially perfect almond shape into something else entirely.
Filing Too Aggressively on the Sides

The number one mistake is removing too much material from the sides too quickly. You can always file more, but you cannot add nail back. Start conservatively and gradually increase the taper. Check your progress frequently. If the sides look too narrow, you have taken off too much and will need to let that nail grow out before trying again.
Sawing Back and Forth
Filing in both directions creates micro-tears in the nail plate that weaken the edge and can lead to peeling and breakage. Always file in one direction - from the side toward the center. Lift the file and return to the starting point for each stroke.
Making the Tip Too Pointy

It is surprisingly easy to turn almond nails into stiletto nails by over-filing the tip. The almond shape should have a soft, rounded peak - not a sharp point. If you go too pointy, gently round the tip by filing small strokes across it from each side. Think “soft mountain” rather than “sharp peak.”
Asymmetric Sides

If one side of the nail tapers more than the other, the nail will look crooked and unbalanced. To avoid this, count your file strokes on each side and try to match them. After every few strokes, look at the nail straight-on to compare both sides.
Not Matching Across All Nails
A common issue is having each nail in a slightly different version of almond. Take the time to compare your nails against each other as you work. Hold your hands together and look at corresponding nails side by side. Matching the shape across all ten nails is what makes the manicure look professional.
Maintaining Your Almond Shape Between Manicures
Once you have filed your perfect almond shape, you want to keep it looking good for as long as possible.
File Lightly Every Few Days

As your nails grow, they grow straight out - which means the almond taper gradually becomes less defined. A few gentle strokes with your file every three to four days keeps the taper looking fresh without requiring a full reshaping session.
Keep Nails Hydrated
Dry, brittle nails are more prone to breaking and chipping, which can ruin your carefully filed shape in an instant. Apply cuticle oil at least once daily - before bed is ideal because the oil has all night to absorb and condition. A CND Solar Oil is a professional favorite that strengthens and hydrates both the nail plate and surrounding skin.
Protect Your Tips

Almond nails have a narrower tip than square or round nails, which means the tip is the most vulnerable point. Be mindful of how you use your hands - avoid using your nails as tools to open packages, peel stickers, or scratch at things. These habits put direct pressure on the tip and are the leading cause of breakage in almond-shaped nails.
Keep a File Handy

If you catch a small snag or chip early, you can often file it out before it becomes a full break. Keep a nail file in your purse, your desk, and your bathroom so you can address minor issues immediately.
Best Colors and Designs for Almond Nails
The almond shape is incredibly versatile when it comes to color and design choices. Its elegant silhouette flatters virtually every style, but some combinations are particularly stunning.
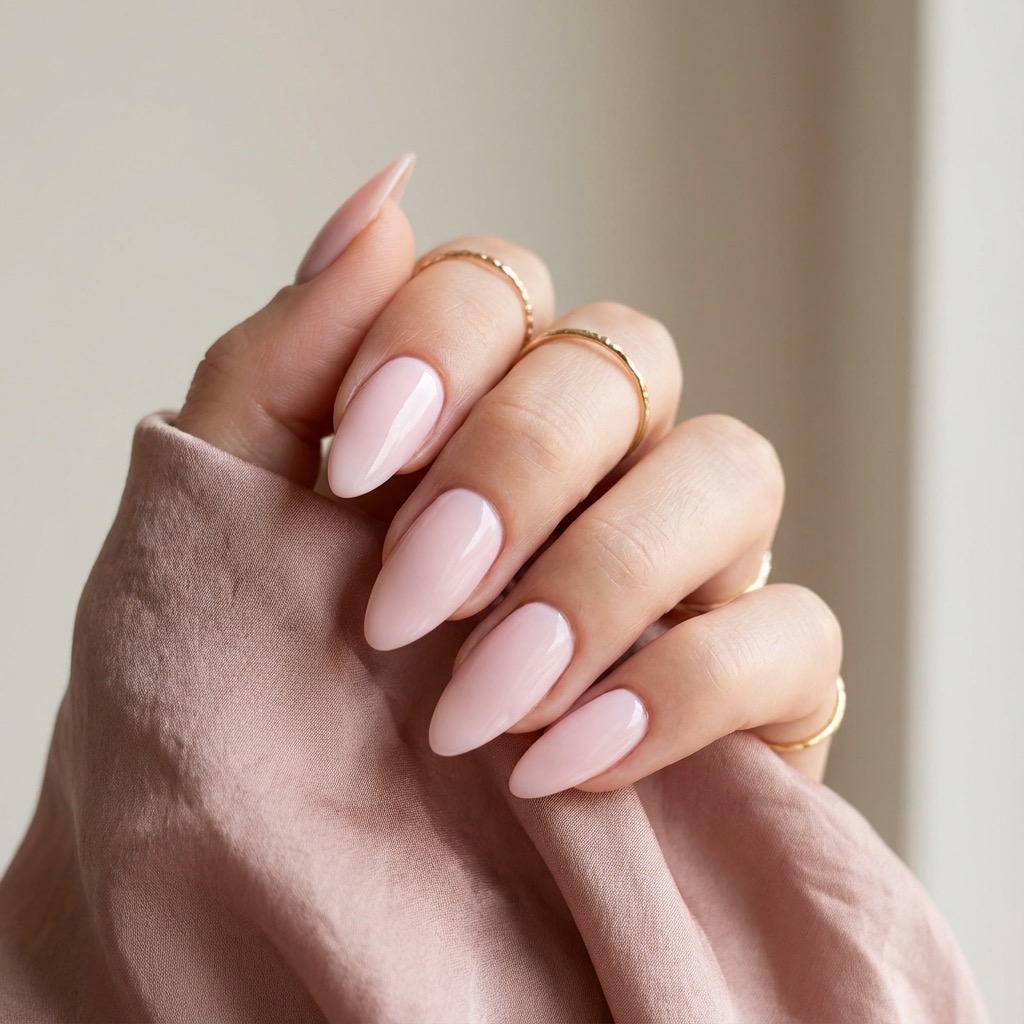
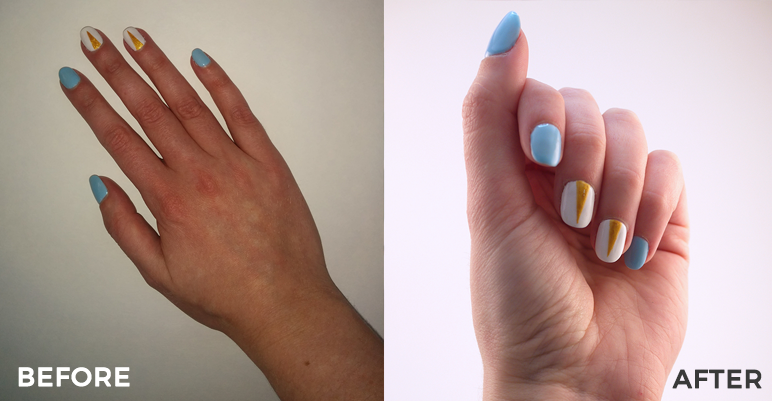
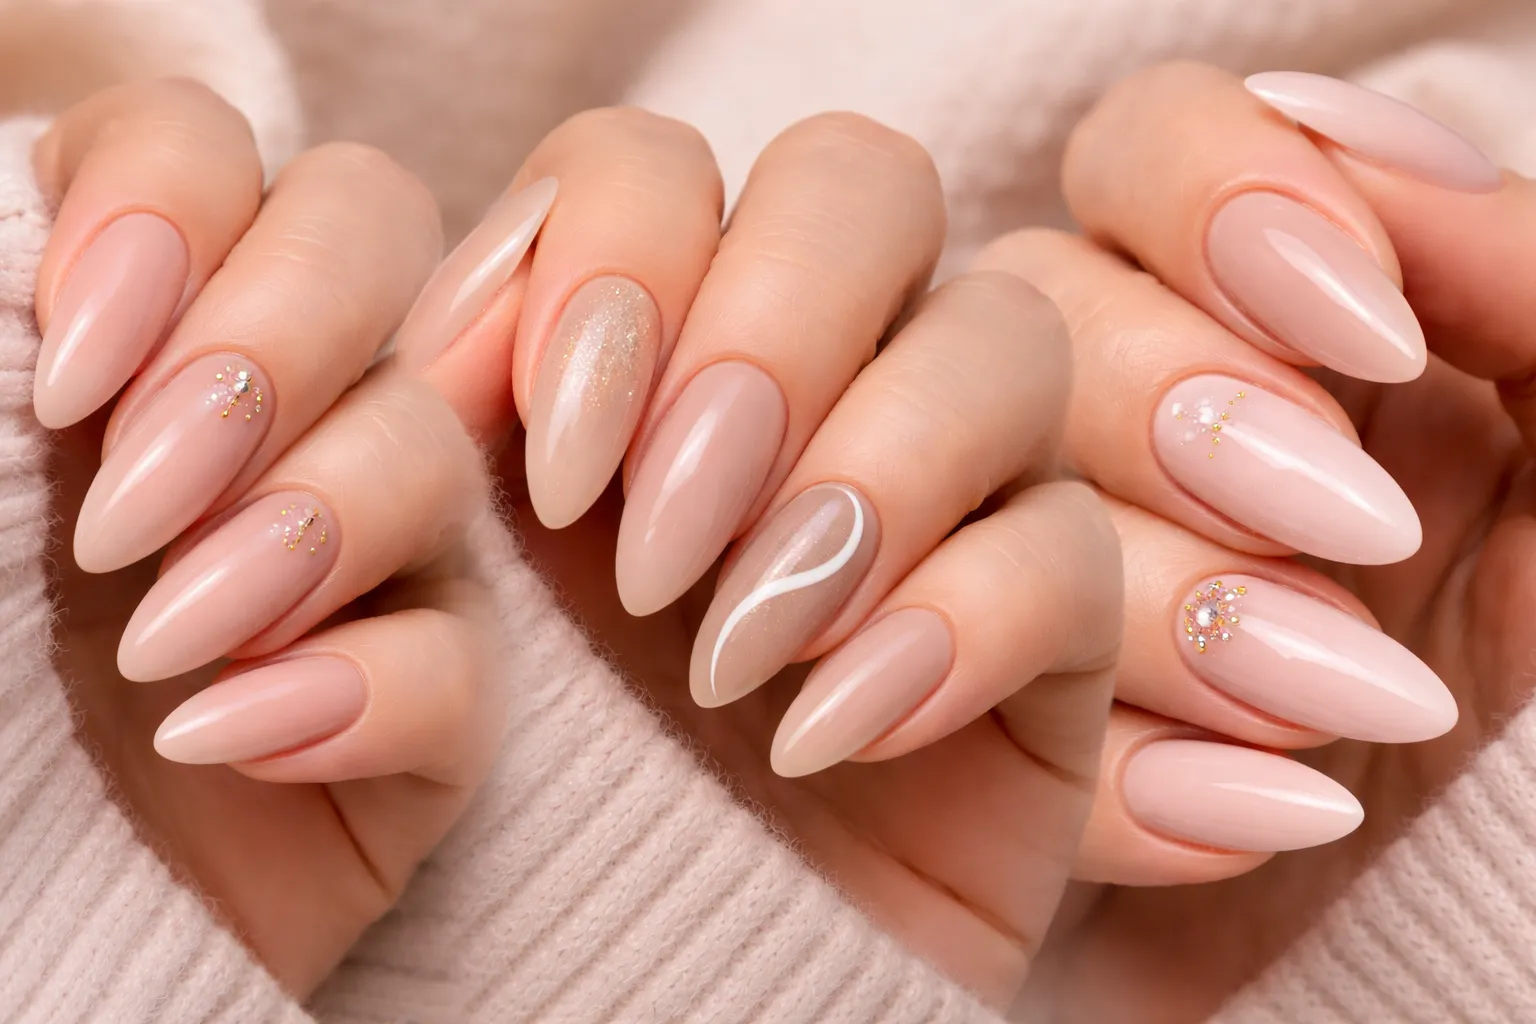
Nude and Neutral Tones

The almond shape was practically designed for nude and neutral polish. The natural-looking shape combined with a “your nails but better” color creates the ultimate elegant, effortless look. Choose a nude shade that matches your skin tone or is one shade lighter for the most flattering effect.
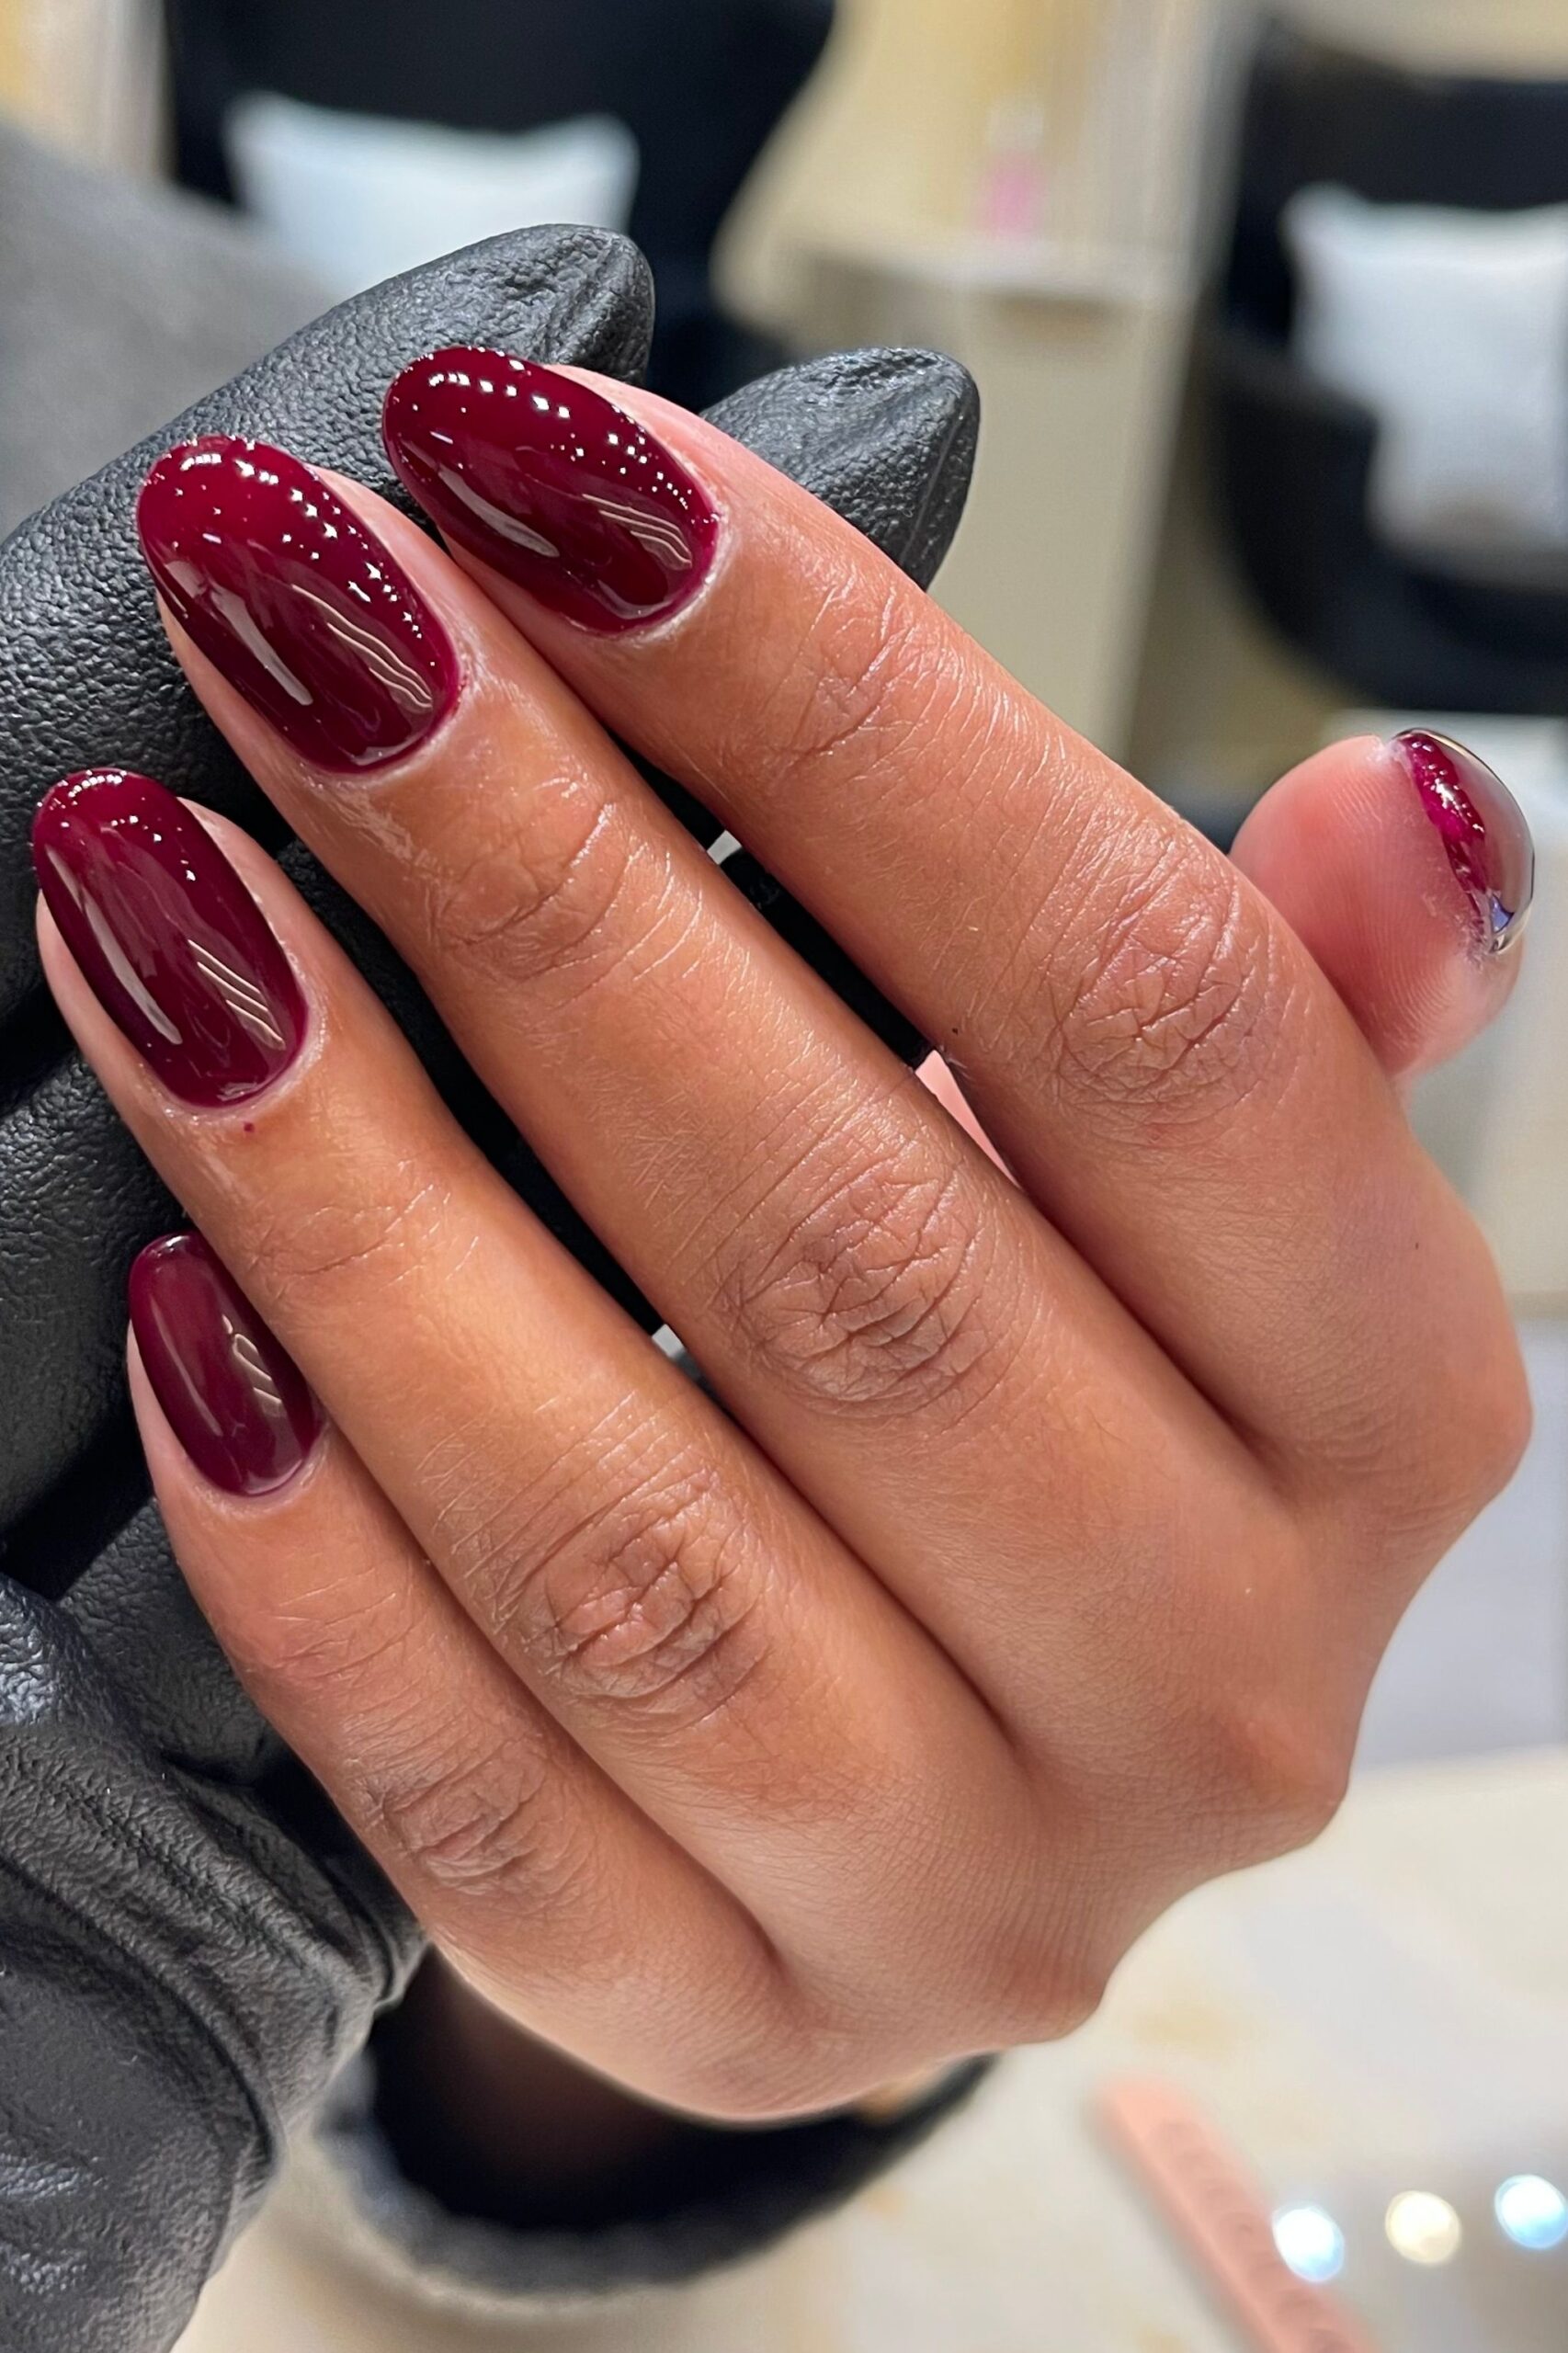
Deep Reds and Burgundies

Classic red on almond nails is one of the most timeless, glamorous combinations in beauty. The tapered shape adds sophistication that a square or round shape does not quite achieve. Deep burgundy, wine, and oxblood shades look especially luxurious during fall and winter.
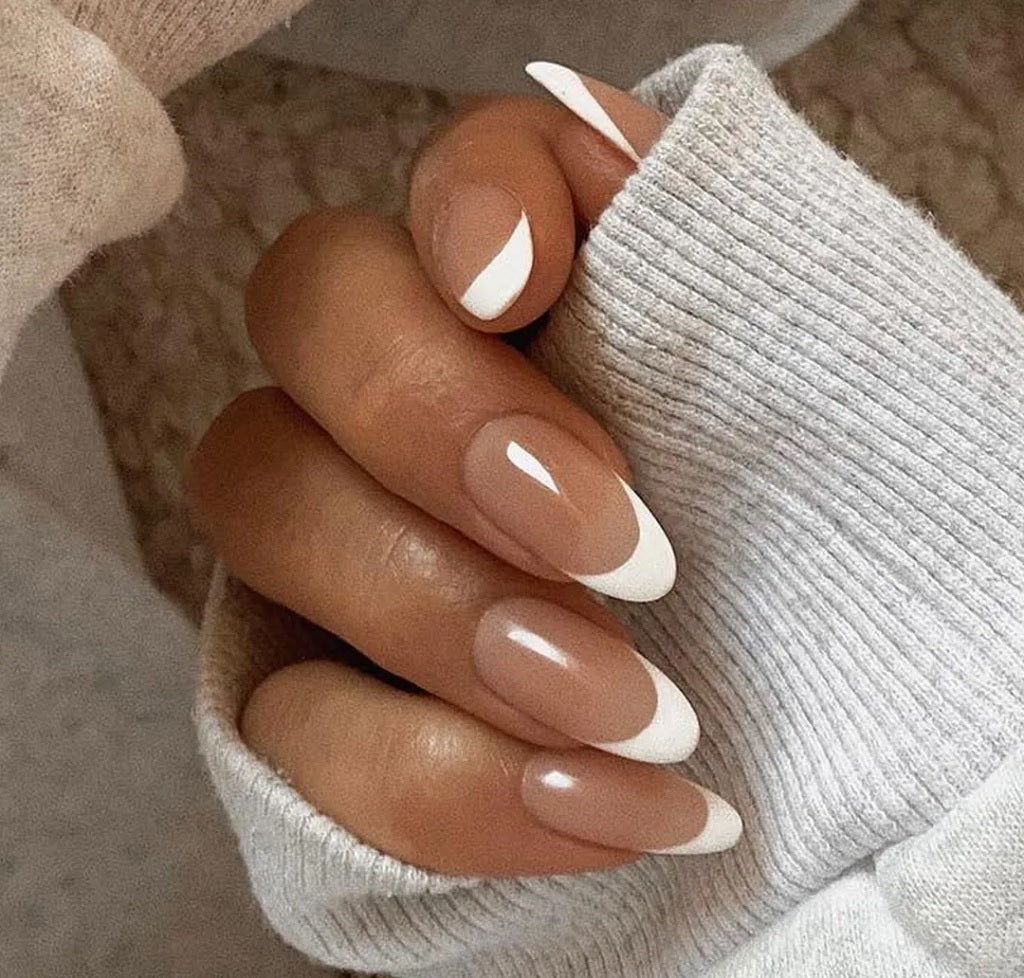
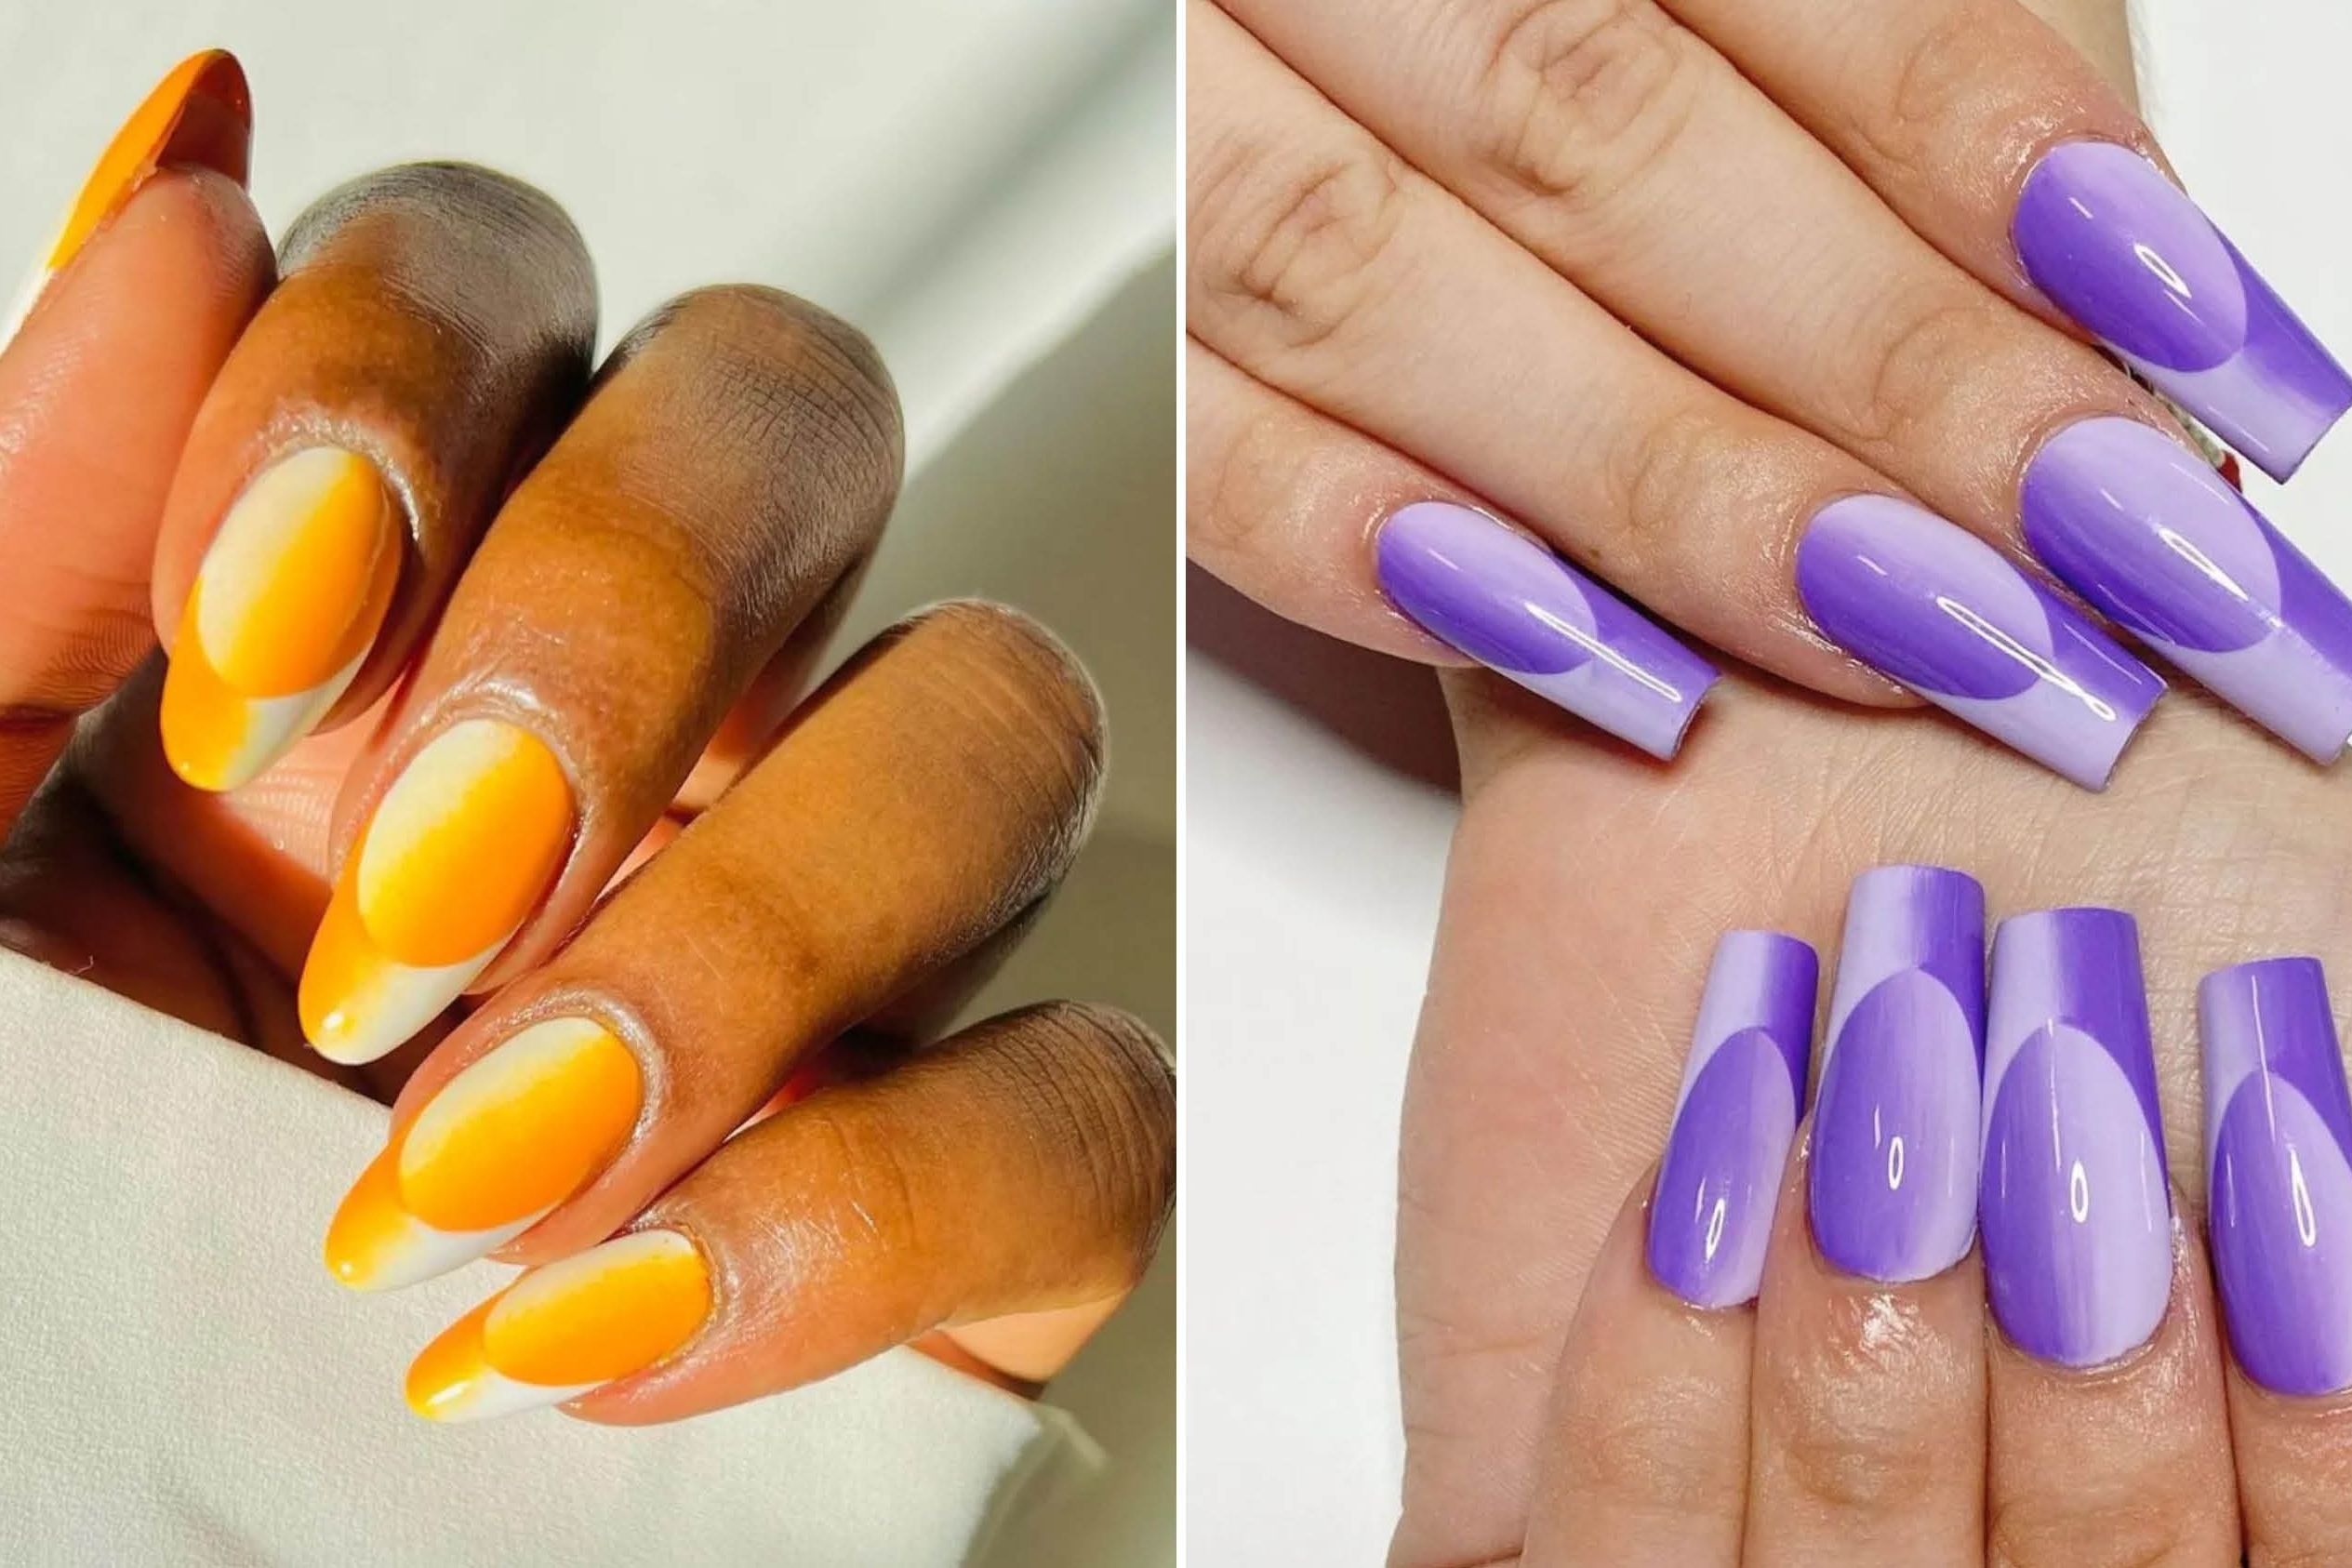
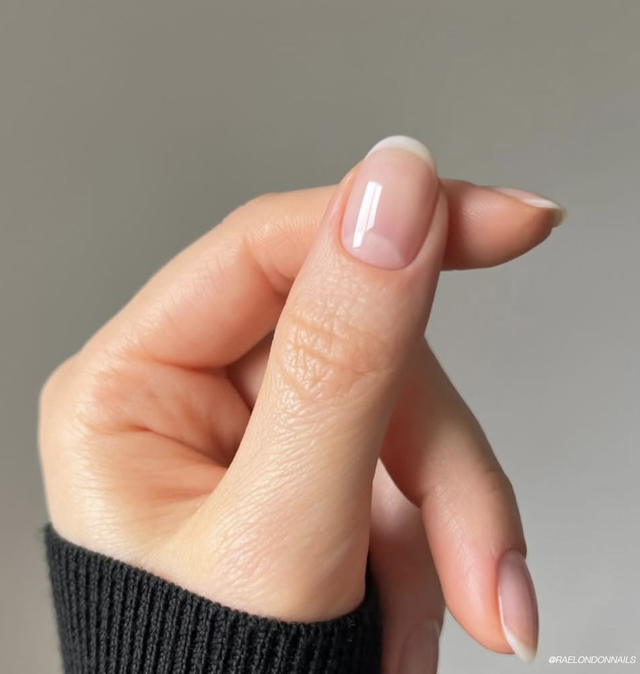
French Tips
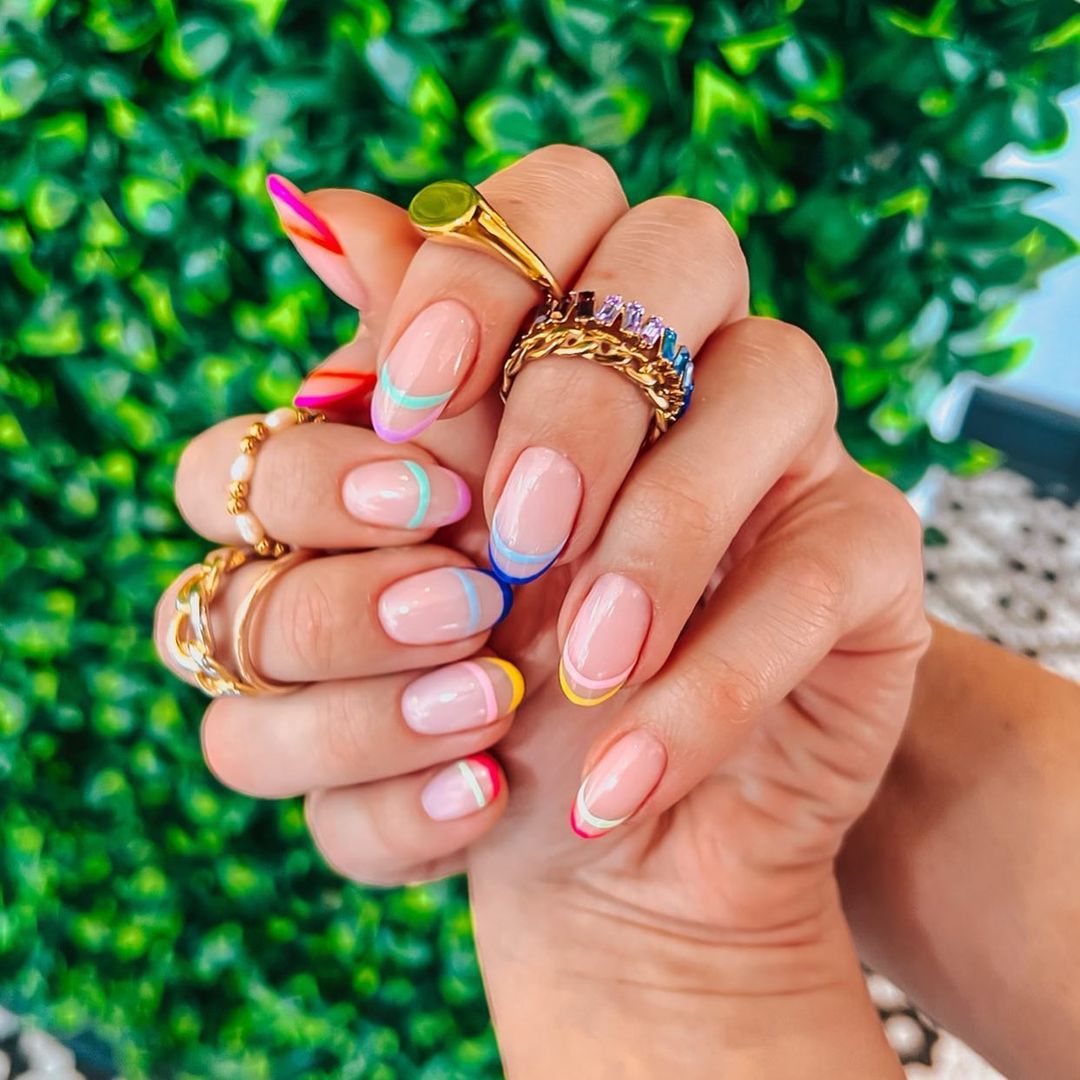
The French manicure on almond shaped nails is an elevated classic. The almond shape makes the white tip look more graceful than it does on square nails. For a modern twist, try colored French tips in soft pink, lavender, or sage green.
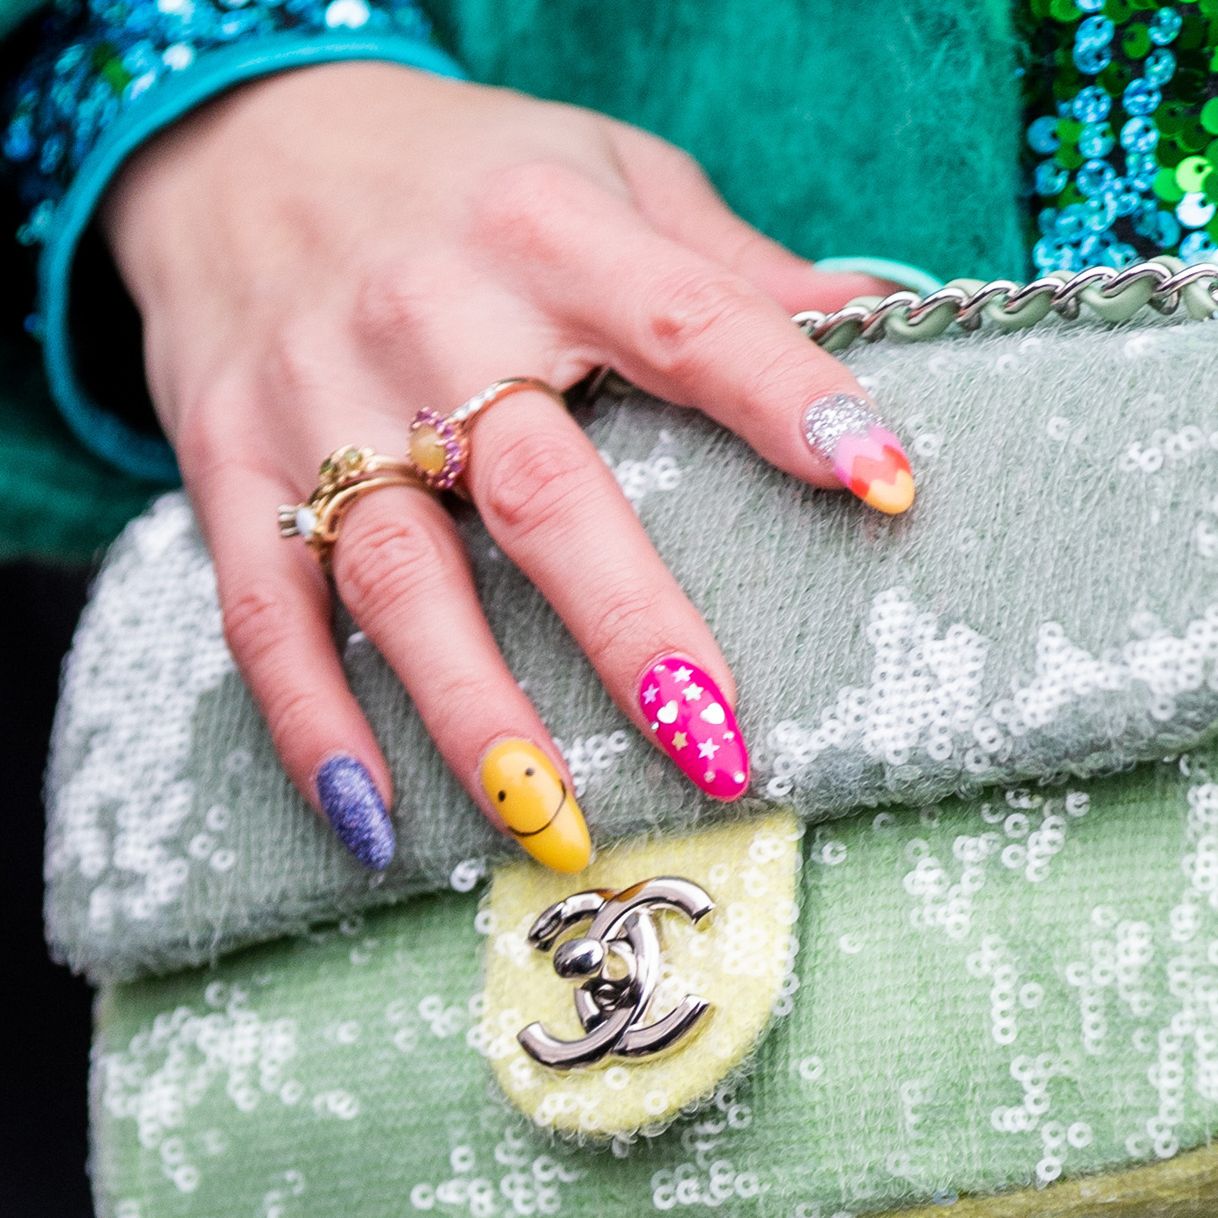
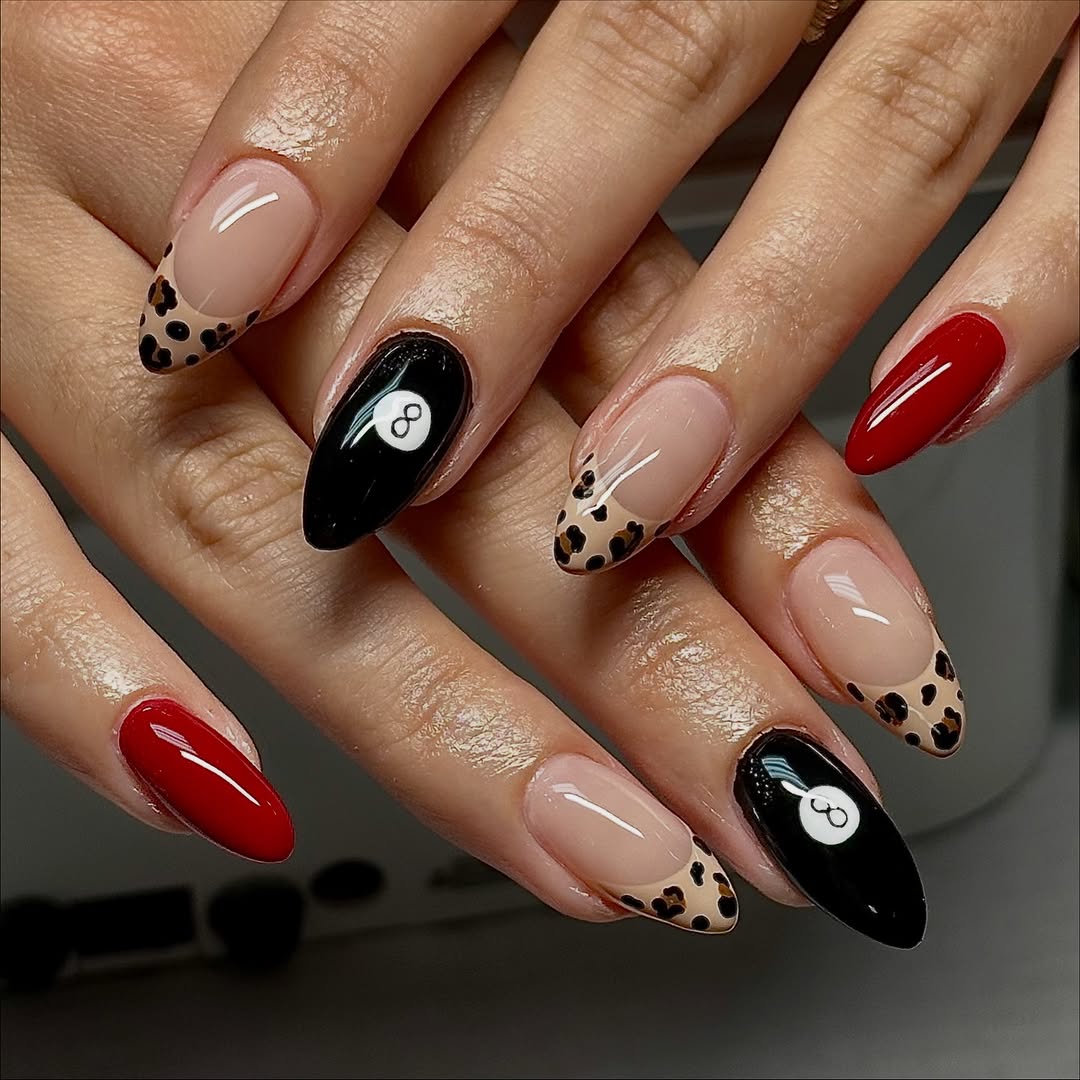
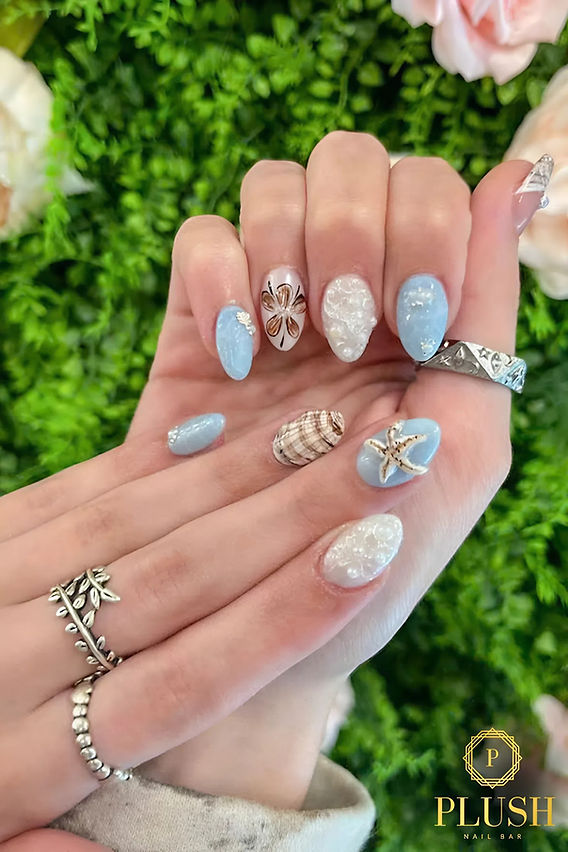
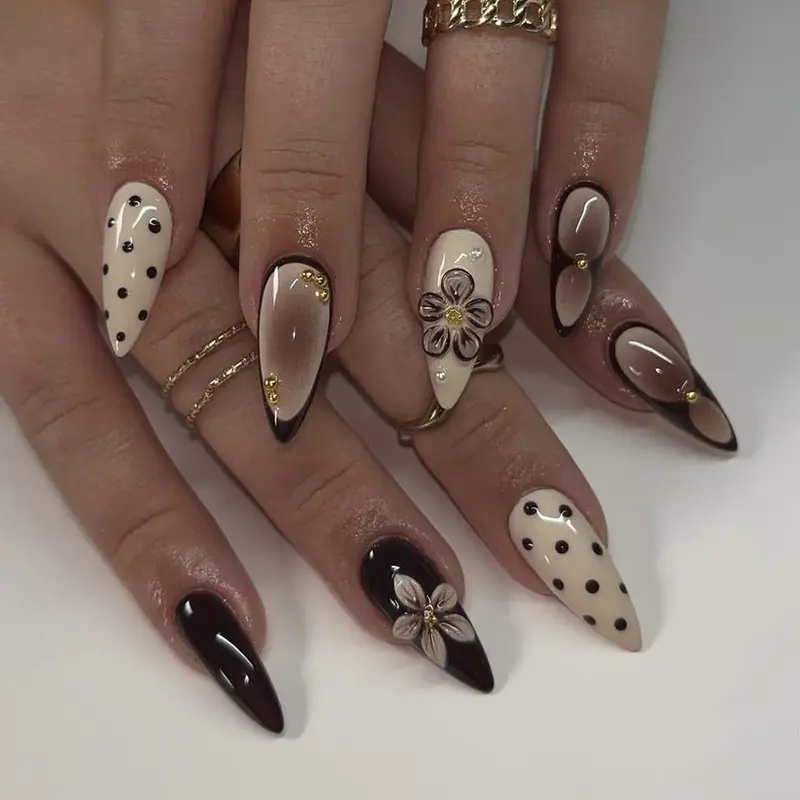
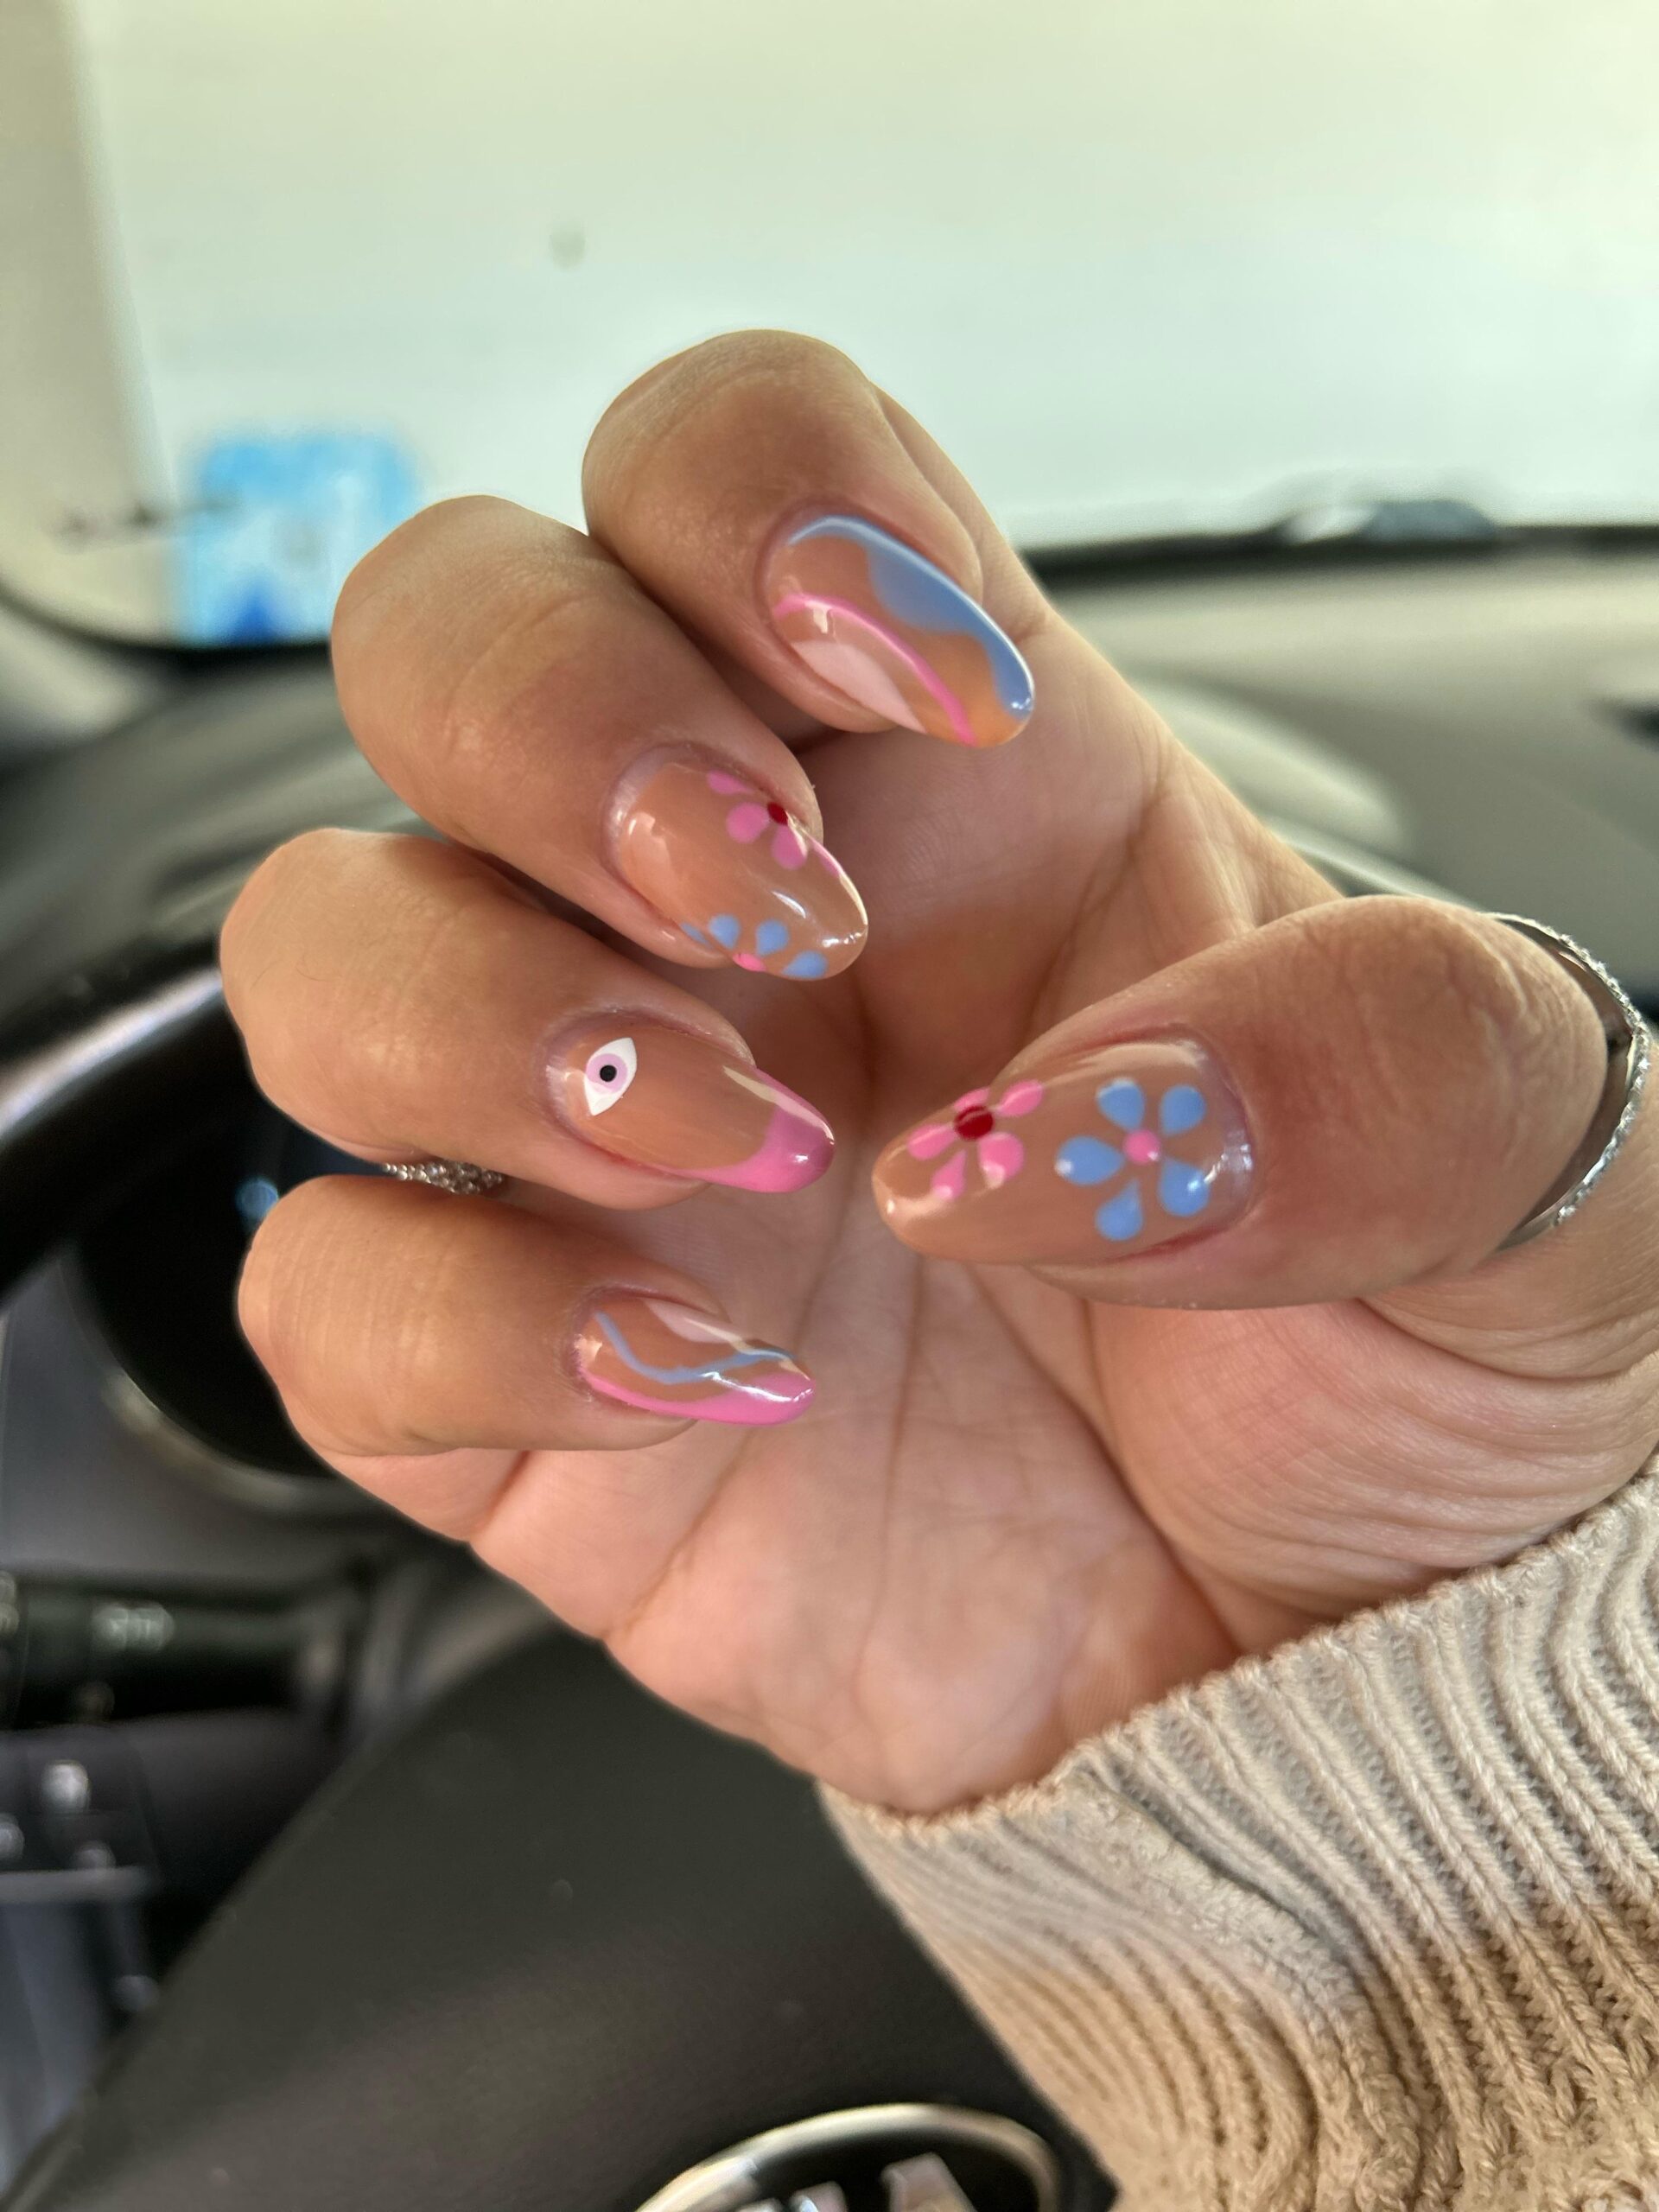
Nail Art
The elongated surface area of almond nails provides an excellent canvas for nail art. The shape particularly suits designs that follow the taper - vine-like florals, ombre fades, or a single accent gemstone at the tip. A floral nail art sticker set can give you salon-quality designs without freehand painting skills.
Strengthening Tips for Natural Almond Nails
Because almond nails taper to a narrower tip, they can be slightly more fragile than wider shapes. Here is how to keep your natural almond nails strong and break-resistant.
Use a Strengthening Base Coat
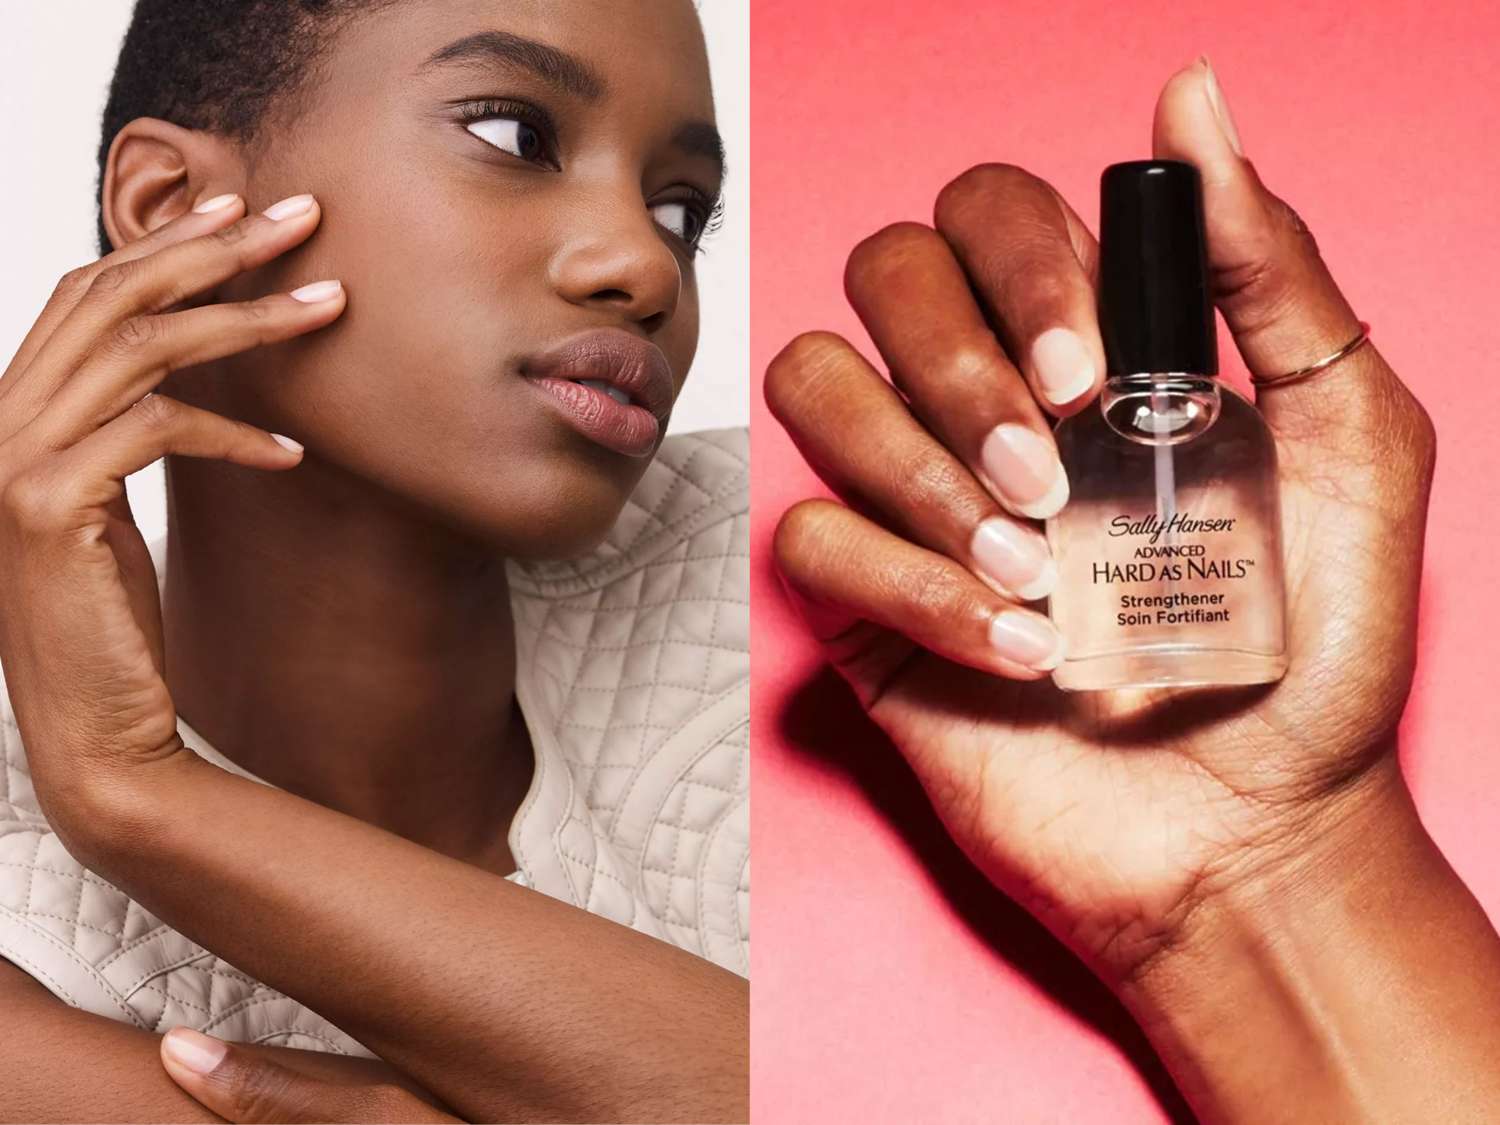
Before applying any color, always apply a strengthening base coat. Formulas containing keratin, biotin, or calcium help reinforce the nail plate and provide extra protection against breakage. This is especially important at the tapered tips where the nail is thinnest.
Consider Biotin Supplements

Biotin (vitamin B7) is one of the most well-researched supplements for nail strength. Studies show that 2.5-5mg daily can improve nail thickness and reduce breakage. Results typically become visible after three to six months. Always check with your healthcare provider before starting any supplement.
Stay Hydrated Inside and Out

Nails that are dehydrated are brittle nails. Drink plenty of water throughout the day to support nail health from the inside. On the outside, apply cuticle oil regularly and consider wearing gloves when using cleaning products.
Avoid Harsh Chemicals

Acetone-based nail polish remover is effective but harsh. Switch to an acetone-free remover for routine polish changes and save pure acetone only for removing gel or acrylics. The gentler formula preserves more of the nail’s natural moisture.
Give Your Nails Breaks

If you wear polish constantly, give your nails a week off every month or so. During this break, apply a nail strengthening treatment and generous amounts of cuticle oil. This allows your nails to rehydrate and recover from any stress caused by polish and remover.
Almond Nails With Extensions and Press-Ons
If your natural nails are too short for almond shape or if you struggle with breakage, extensions and press-on nails offer fantastic alternatives.
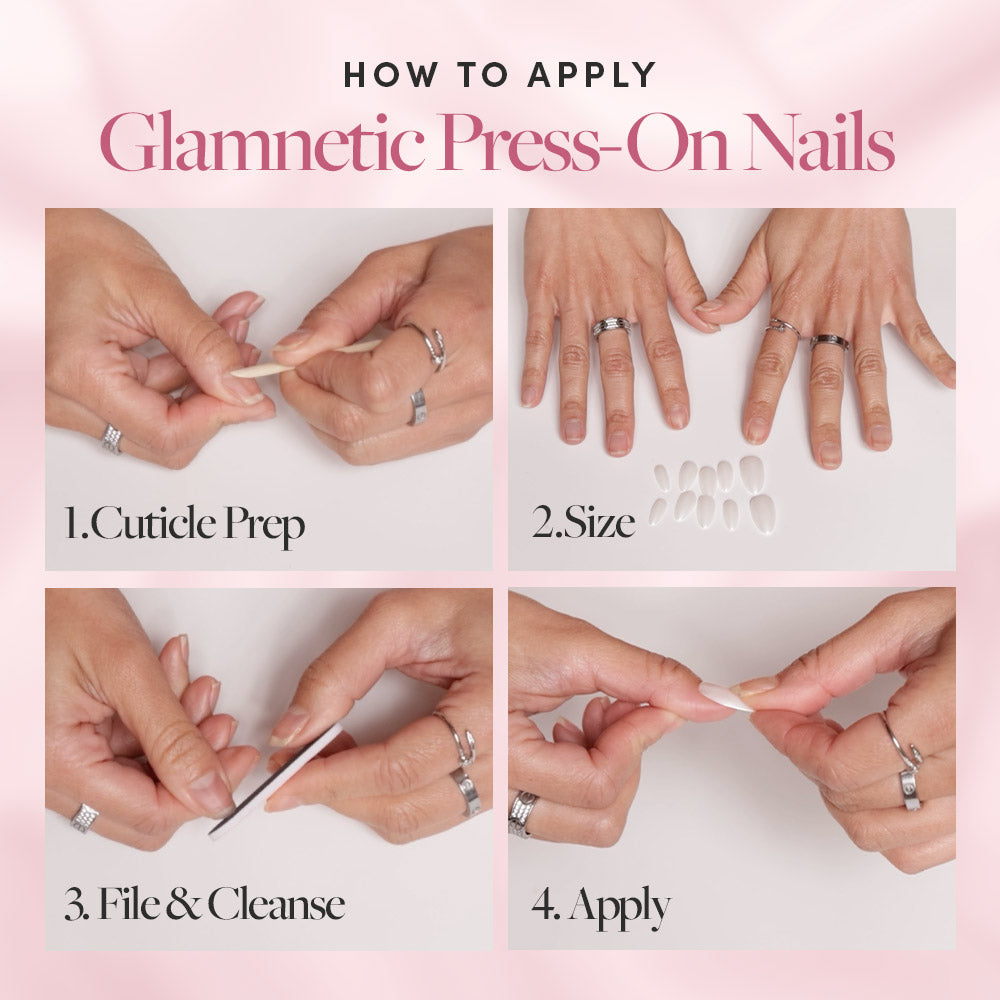
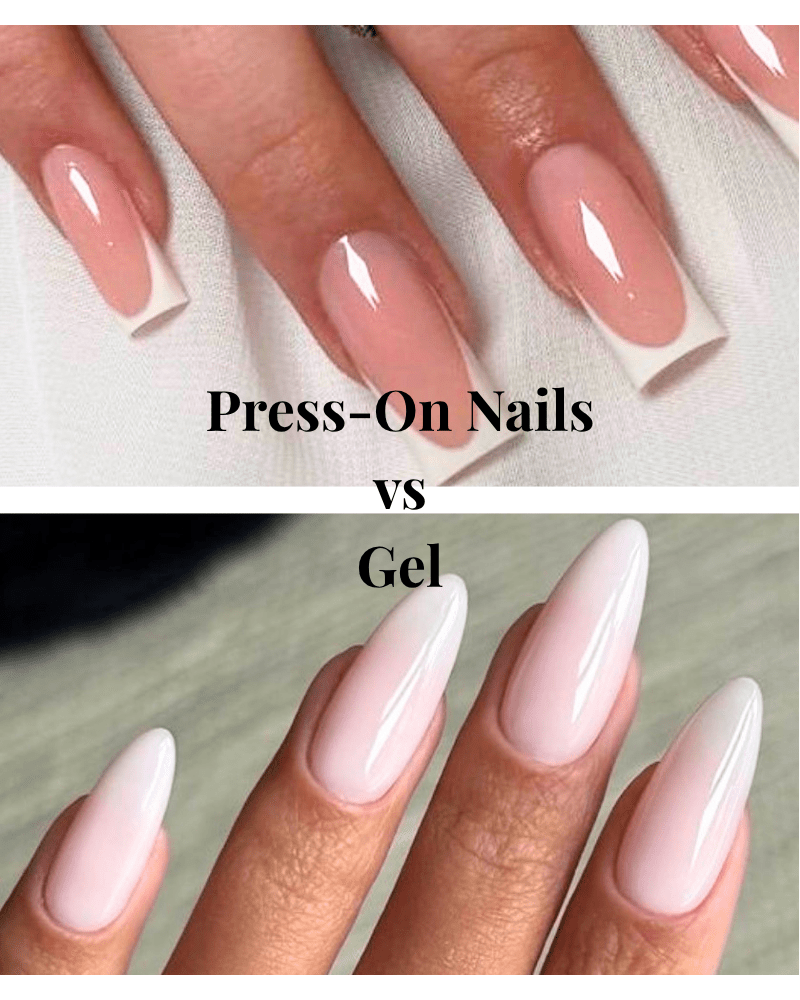
Press-On Nails
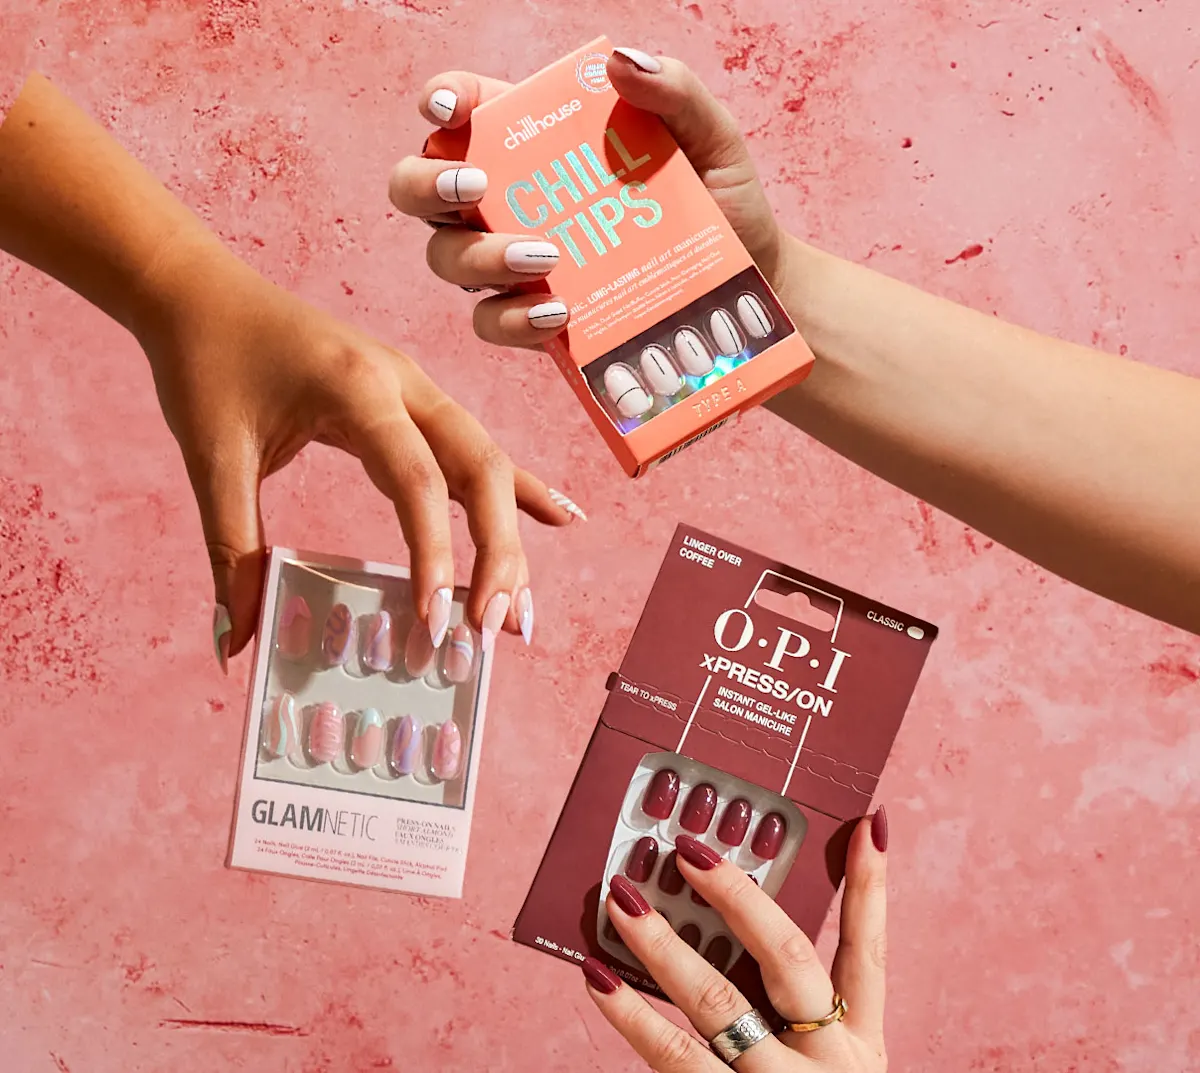
Press-on nails have come a long way from the chunky, obviously fake versions of the past. Modern press-ons come in almond shape pre-made, and many look remarkably realistic. They are incredibly easy to apply - most take under 15 minutes for a full set. Look for press-ons that come in multiple sizes for the best fit. A good almond-shaped press-on nail set can last 1-2 weeks with proper application and gives you a salon-worthy look at a fraction of the price.
Gel Extensions
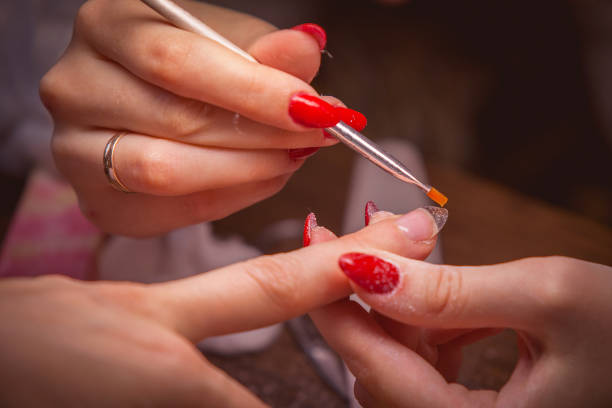
Gel extensions, also called soft gel tips, are a popular salon option for adding length while maintaining a natural look. Your nail technician will apply pre-shaped gel tips in almond shape and then blend them seamlessly with your natural nail. Gel extensions are lighter and more flexible than acrylics, which many people find more comfortable.
Acrylic Extensions
Acrylic remains the gold standard for durability and longevity. A skilled nail technician can sculpt perfect almond shapes from acrylic that last 2-3 weeks before needing a fill. Acrylics are slightly heavier than gel but offer unmatched strength, making them ideal if you are hard on your hands.
Whatever method you choose, almond shape consistently ranks as one of the most requested shapes at salons worldwide. Its timeless elegance, universal flattery, and moderate length make it the perfect balance between practical and glamorous. Whether you achieve it through natural nail filing, press-ons, or professional extensions, almond nails are always a good idea.
Key Takeaways
- Almond shaped nails are universally flattering because they create a tapered silhouette that elongates fingers and slims the nail bed
- Always file in one direction from the side toward the center to prevent nail damage and achieve the smoothest edge
- Nails need at least 3-5mm of free edge past the fingertip for a true almond shape, but a modified short almond works on shorter nails
- The most common mistake is over-filing the sides or making the tip too pointy - check symmetry frequently and remember soft mountain not sharp peak
- Maintenance is simple - a few light filing strokes every few days plus daily cuticle oil keeps almond nails looking freshly shaped
- Press-on nails and salon extensions are excellent alternatives if your natural nails are too short or fragile
Frequently Asked Questions
Are almond shaped nails hard to maintain?
Not at all. Almond nails actually require less precise maintenance than square or coffin shapes because the organic taper is more forgiving. A few gentle filing strokes every few days keeps the shape looking fresh. The tapered tip is slightly more fragile than wider shapes, so being mindful about not using your nails as tools helps prevent breakage.
Can almond nails work on wide nail beds?
Absolutely - and in fact, almond shape is often recommended specifically for wider nail beds. The tapering sides create a narrowing optical illusion that makes the nail bed appear slimmer and more proportional. Many people with wider nail beds find that almond shape transforms the look of their hands more dramatically than any other shape.
Is almond shape stronger or weaker than other shapes?
Almond falls in the middle of the strength spectrum. It is stronger than stiletto, coffin, and lipstick shapes because it has no sharp points or flat edges that concentrate stress. However, it is slightly less strong than round or squoval shapes because the tapered tip is narrower. For most people, almond nails hold up just fine. A strengthening base coat adds extra protection if needed.
How do I file almond nails on my dominant hand?
This is a universal struggle. Some tips: rest both hands on a flat surface to stabilize them, file more slowly with your non-dominant hand, and check your progress more frequently. You can also try holding the file still and moving your nail against it. Some people choose to do accent art only on their non-dominant hand and keep the other in a solid color.
Can I change my current nail shape to almond without cutting shorter?
It depends on your current shape and length. If you currently have square nails, you can usually transition to almond by filing the corners and sides into a taper without losing much length. The transition is easiest from oval to almond since the shapes are closely related. File gradually over two to three sessions rather than trying to completely change the shape in one sitting.