

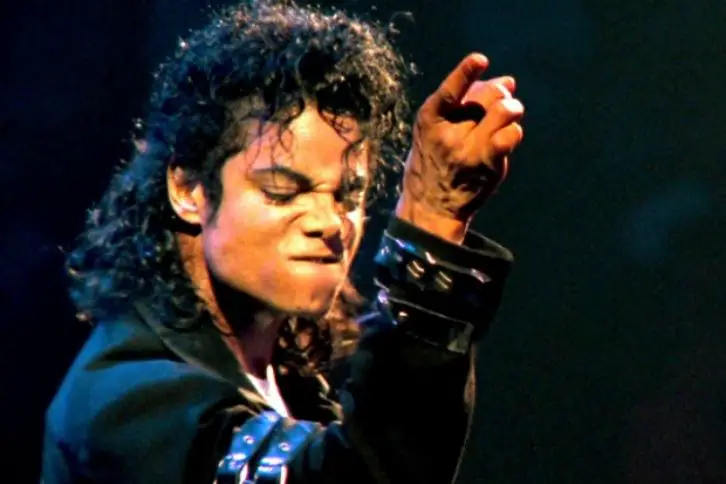
Since the eighties when it was created by the hairstylist, Jheri Redding, the Jheri curl has been around for a while. Several celebrities have since rocked this hairstyle, including Michael Jackson, Eddie Murphy, Eazy E, Ice Cube, and Edmund Sylvers. Lovers of this hairstyle often switch between the names Jheri curl and Jerry curl.
When it was first created, it was touted as a wash and wear hairstyle that was easier to care for than relaxed hair. Even better, it blessed its wearer with loose curly, shiny hair.
So, considering how popular this hairstyle was and has now become, what exactly is it and why did it latch on so quickly to the black community? More importantly, how can you make this classic hairstyle modern enough?
What is a Jheri Curl?
The Jheri curl was popularized by Michael Jackson in his “Thriller” video in 1982 and has since been worn by entertainment greats, becoming one of the staples of nineties fashion.
While Irish-American Jheri Redding created this iconic hairstyle, it was actually the entrepreneur Comer Cottrell who helped it find mainstream acceptance.
Achieving this look used to be quite expensive as a small bottle of activator used to retail for $6. Nowadays, this has changed and cheaper options are now available thanks to Cottrell’s Curly Kits that retailed for cheaper and let the general public in on the hairstyle.
The process of Jheri curling your hair is split into just two processes: softening the hair and setting the curls. A softener is first applied to natural hair to loosen the curls after which another solution is used to permanently set the curls.
Wearers are required to maintain their hair appropriately and wear hair bonnets before they sleep to avoid getting hair grease from products all over their clothes and pillowcases. The process can also be time-consuming, but undoubtedly, the result is worth it.
If you have time on your hands and you want to get this classic and beautiful look, then don’t despair. Below is a step-by-step process to go back in time and get your hair looking like Michael Jackson’s.
How to get a Jerry curl
The iconic Jerry curl hairstyle is making its comeback like so many other nineties fashion statements, so it’s time for you and everyone else to learn how to achieve this look. Here’s good news for you: it’s not complicated at all. All you need are the right products and time.
As previously stated, this process is split into two: first, you have to loosen your tight, natural curls before using another product to set the hairstyle so it stays.
One very important point to note is that you’re actually applying chemicals to your hair, so if you’re doing it by yourself at home, you need to be very careful or you can seriously damage your hair.
To minimize damage, you need to follow the steps below to get the perfect jerry curls.
1. Wash your hair with shampoo
Before you start, you’ll need to wash your hair thoroughly with a sulfate-free shampoo. You don’t know how long this style will last so you want your scalp to be as clean as possible so you can go a long time between washes. Also, it won’t do to have itchy hair thanks to dirt on your scalp.
2. Cover your skin to avoid damage
Cover your skin as much as possible to avoid skin damage from the chemicals that you’re about to apply to your hair. Ensure that you have a towel pulled very close to your hairline and around your neck. To ensure that you are as safe as possible, test the chemical on a small section of your hair before applying it to your whole head.
3. Partition your hair
Now, you’ll need to partition your hair into three or four sections depending on your hair volume and length. After doing this, you’ll need to wrap your hair in rods. The size of these rods is solely up to you, however, you should ensure that you make an informed decision.
4. Apply the hair softener
Next, you’ll need to apply your hair softener. The job of the softener is to soften your natural curls enough to loosen your hair. The softener should be applied liberally all over your hair and then left to work.
5. Rinse your hair
After letting the hair softener sit for a while, rinse your hair. Ensure that you use cold water to thoroughly rinse your hair and get all the chemicals out. If you leave any chemicals in your hair, you can seriously damage your hair. Rinse your hair twice to be sure that you’ve gotten it all out.
6. Apply the neutralizer
Next, you’ll apply the neutralizer, which also works to help your hair form those cute rounded shapes that make up the entirety of the jerry curl hairstyle.
7. Remove the rods and style
Finally, you’ll remove the rods from your hair after five minutes and then rinse your hair again. You should see the beautiful curls at this time. Dry your hair and style your hair as you want.
How long does the Jheri curl last?
This hairstyle is not permanent and it will only last as long as you want it to, as long as you properly take care of it. You will need to get curl activator sprays and moisturizers that you’ll apply to your hair frequently. You’ll also need to use hair bonnets so that the grease from your hair doesn’t cause unnecessary stains everywhere.
Conclusion
Jheri curls, also known as Jerry curls, have been around since the eighties. It is a fun, different hairstyle to try if you want to switch up your look. Like many other hairstyles, you can get the look by yourself, however, it is advisable to visit a salon for this hairstyle as there are several dangerous chemicals involved.